让你的ESP32试试串流吧
(2025 年 11 月更新)这篇文章写于 5 年前,但它至今仍是我流量最高的文章之一。 它所展示的‘PC 到 ESP32 实时串流’的核心原理——即‘Python 抓帧/编码’ + ‘自定义 TCP 协议’ + ‘ESP32 解码/DMA 渲染’——这个架构在今天依然极具参考价值。
 既然有了屏幕,又有了网络,那岂不是可以串流了!
序
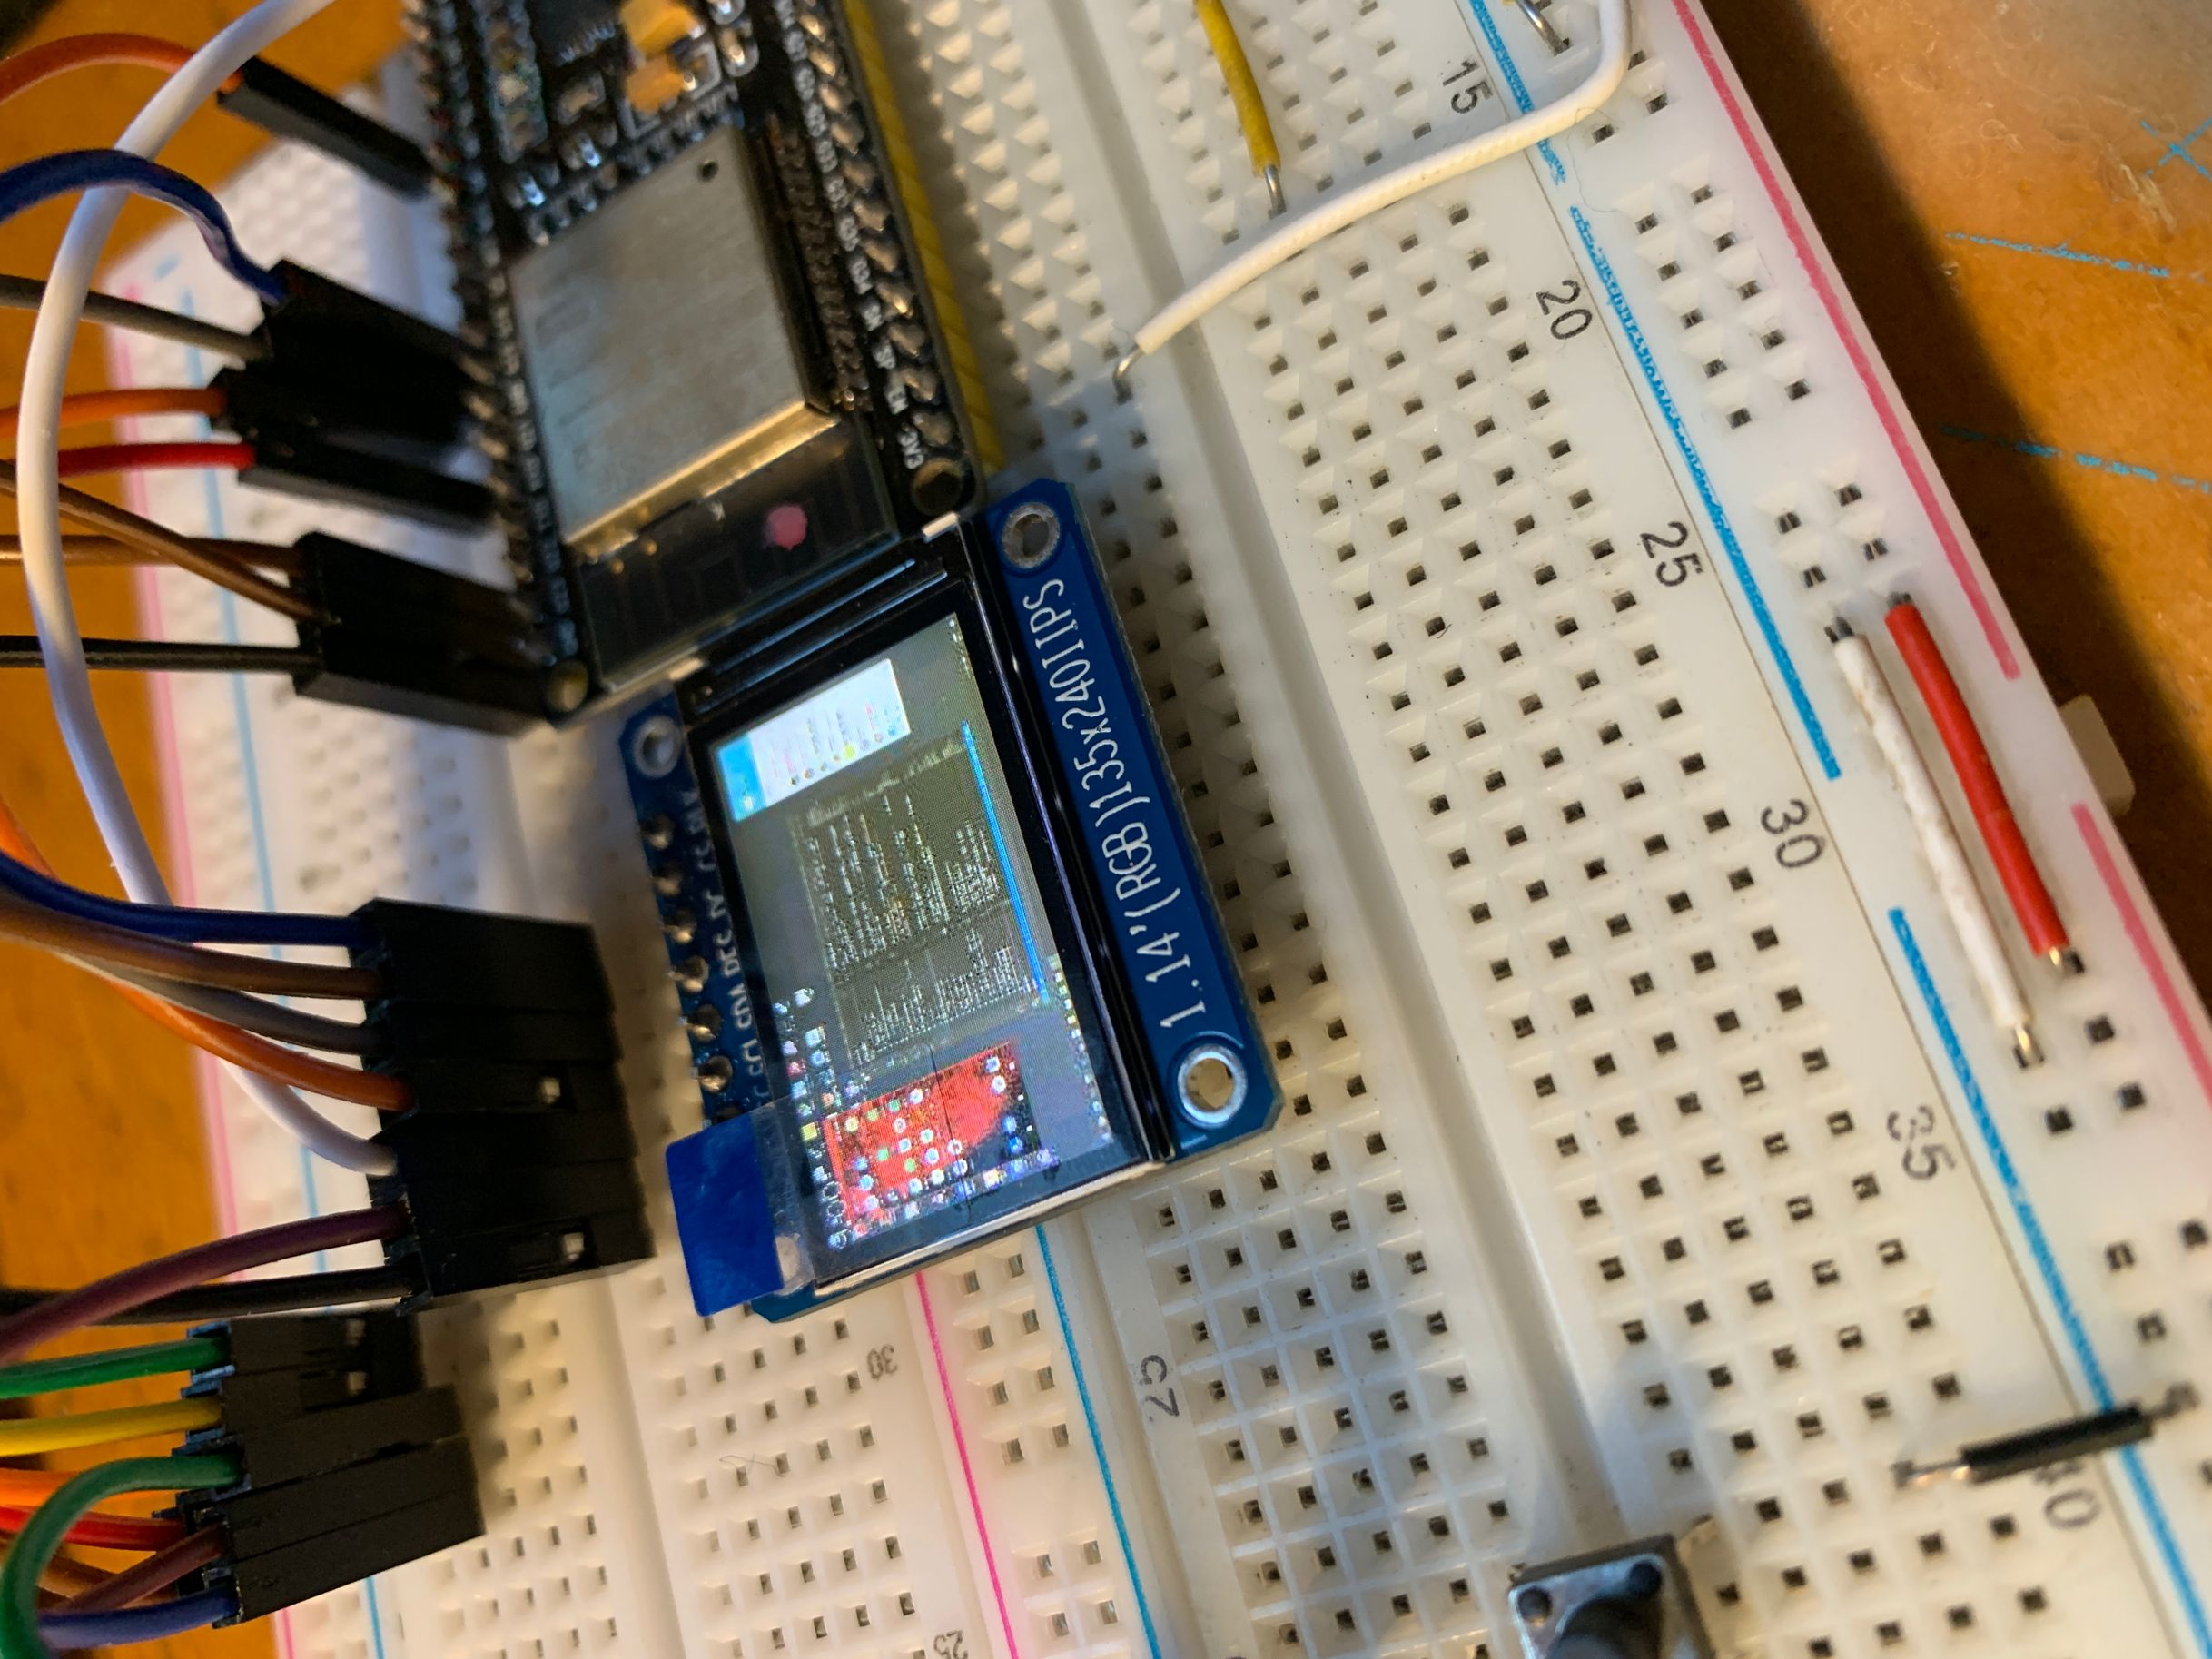
这次我们来整个活。利用ESP32来显示电脑的画面!如果你用的是其他屏幕也没关系,只要是ESP32配合TFT_eSPI就可以实现,只是在帧率上会有所区别。 这个视频为你展示了在M5StickC上的运行效果 现在是除了游戏性以外,一无所有的原神@bilibili
实现方式
电脑作为发送端,负责发送图像数据->EPS32作为接收端,负责接收并绘制图像数据 发送端使用python编写,使用mss模块捕获屏幕画面,再使用python opencv 编码为JPG
接收端使用C++编写,TJpg_Decoder解码,TFT_eSPI绘制
发送的数据以帧为单位,为了减小帧的体积,将会对每一帧原始位图数据使用JPG编码,ESP32接收到数据以后,先对JPG进行解码,再进行绘制。
一次完整通信流程为:
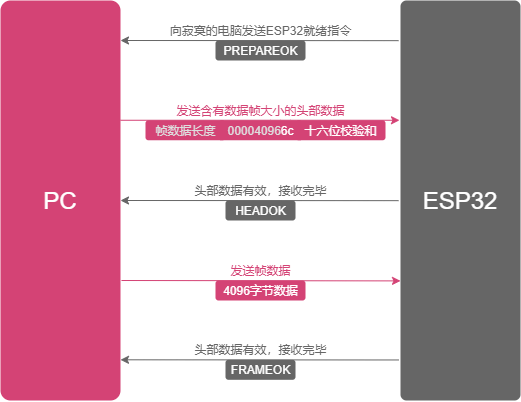
精简的代码
要让 Python上位机 和 下位机C++ 沟通,第一步是定义一个‘协议’。我没有用复杂的 HTTP,而是设计了一个极简的 3 步握手协议(PREPAREOK, HEADEROK, FRAMEOK),用它来确保帧数据不会丢失或错位
##ifndef COMMON*MACRO_H*
##define COMMON*MACRO_H*

// Debug情况下,暂时不去测试串流,也无需连接wifi
##define DEBUG

/_
======================串流相关======================
_/
// 帧数据接收完毕
##define FRAMEOK 0x01
// 头部接收完毕,接收帧
##define HEADEROK 0x02
// 准备完毕,接收头部 注:0x03无法正常发送
// https://www.cnblogs.com/young525/p/5873795.html
##define PREPAREOK 0x41

/_
======================屏幕相关======================
_/
##define SCREEN_WIDTH 240
##define SCREEN_HEIGHT 135

/_
======================WiFi相关======================
_/
##define ssid "CloseWrt_2.5G"
// WiFi 密码
##define password "have5seeds"

##endif
在 ESP32(接收端),我把所有逻辑封装成一个 StreamingComponent 类。它的核心是状态机(IDLES, RUNNING)和两个关键的缓冲区:一个 headerBuffer(用来接收帧大小)和一个 wifiBuffer(用来接收 JPG 数据)
##ifndef STREAMINGCOMPONENT*H*
##define STREAMINGCOMPONENT*H*

##define IDLES 0
##define RUNNING 1
##define EXITING 2

##include <TFT_eSPI.h>
##include <TJpg_Decoder.h>
##include <WiFi.h>

##include "utils.h"
##include "common_macro.h"

class StreamingComponent {
public:
StreamingComponent(WiFiClient &clt, TFT_eSPI &tft);

    uint8_t status = IDLES;

    void enter();
    void exit();

    void loop();


    bool drawCallBack(int16_t x, int16_t y, uint16_t w, uint16_t h,
                      uint16_t *bitmap);

// ~StreamingComponent() {
// Serial.printf("~StreamingComponent\n");
// free(wifiBuffer);
// free(headerBuffer);
// free(frameSizeBuffer);
// };

private:
// WiFiClient指针
WiFiClient *client;
// TFT_eSPI指针
TFT_eSPI *Tft;
// 帧率相关
double fps_avg = 0.0;
uint32_t sec{}, psec{};
uint16_t fps = 0, frame_count = 0;
// 帧率相关

    // 执行时间相关
    // 函数执行时间
    uint32_t cost{};
    // 一次loop执行时间
    uint32_t loopCost{};

    // 缓冲部分

    // 帧数据大小
    uint16_t size{};
    // 已经下载帧数据大小
    uint16_t bSize{};
    // DMA缓冲相关
    // 2020.12.04若出现发送端发送超过wifiFrameSize大小(32kb),
    // 则会导致出错,而此处无法分配更大内存。
    // 暂时未找到正确开启SPIRAM方法
    // 2020.12.04将图片压缩方式从LZO改为jpg
    const int wifiFrameSize = 1024 * 32;
    // 头数据大小
    const int headerFrameSize = 10;
    // 待下载的jpg图片缓冲
    uint8_t *wifiBuffer =
            (uint8_t *) heap_caps_malloc(wifiFrameSize, MALLOC_CAP_8BIT);
    // 头数据缓冲
    uint8_t *headerBuffer =
            (uint8_t *) heap_caps_malloc(headerFrameSize, MALLOC_CAP_8BIT);
    // 帧数据大小缓冲,用于解析字符串为int
    uint8_t *frameSizeBuffer =
            (uint8_t *) heap_caps_malloc(headerFrameSize - 1, MALLOC_CAP_8BIT);
    // DMA 双缓冲模式
    uint16_t dmaBuffer1[16 * 16]{};  // Toggle buffer for 16*16 MCU block, 512bytes
    uint16_t dmaBuffer2[16 * 16]{};  // Toggle buffer for 16*16 MCU block, 512bytes
    uint16_t *dmaBufferPtr = dmaBuffer1;
    // 当前使用的DMA缓冲
    bool dmaBufferSel = 0;
    /**
     * 显示回调,用于Tjpeg
     * 2020-12-06
     */

    /**
     * 接收数据
     * 2020-12-01
     * size: 5222 bytes
     * cost: 16 ms
     */
    void onReceiveData();

};

##endif
实现的核心在 onReceiveData()。在这个函数中,它首先等待 PREPAREOK,然后读取 10 字节的‘头部’,解析出帧大小(size),再发送 HEADEROK;然后它才开始接收那 size 字节的 JPG 图像,存入 wifiBuffer.
##include "StreamingComponent.h"

StreamingComponent::StreamingComponent(WiFiClient &clt, TFT_eSPI &tft) {
this->client = &clt;
this->Tft = &tft;
Serial.println("StreamingComponent Constuctor");
};

void StreamingComponent::enter() { status = RUNNING; };

void StreamingComponent::exit() { status = EXITING; };

void StreamingComponent::loop() {
if (status == RUNNING) {
Serial.println("StreamingComponent loop");
loopCost = millis();
onReceiveData();
Serial.printf("fps_avg:%f,loop cost:%d ms\n", fps_avg, millis() - loopCost);
Tft->drawString(String(fps_avg), 0, 0, 2);
} else if (status == EXITING) {
// 啥也不做
}
};

bool StreamingComponent::drawCallBack(int16_t x, int16_t y, uint16_t w,
uint16_t h, uint16_t \*bitmap) {
if (status == RUNNING) {
if (y >= SCREEN_HEIGHT) return 0;
if (dmaBufferSel) {
dmaBufferPtr = dmaBuffer2;
} else {
dmaBufferPtr = dmaBuffer1;
}
dmaBufferSel = !dmaBufferSel;
Tft->pushImageDMA(x, y, w, h, bitmap, dmaBufferPtr);
}
return true;
}

// ~StreamingComponent() {
// Serial.printf("~StreamingComponent\n");
// free(wifiBuffer);
// free(headerBuffer);
// free(frameSizeBuffer);
// };

void StreamingComponent::onReceiveData() {
Serial.println("StreamingComponent onReceiveData");
StreamingComponent::client->write(PREPAREOK);
Serial.println("StreamingComponent client.write(PREPAREOK);");
cost = millis();
if (headerBuffer == nullptr) {
Serial.printf("headerBuffer is null.\n");
} else {
client->readBytes(headerBuffer, headerFrameSize);
Serial.printf("receive header cost:%d ms\n", millis() - cost);
}

int sum = checkSum((const char _)headerBuffer, 8);
// Serial.printf("headerBuffer checkSum: %d\n", sum);
if ((sum & 0xf) == c2i(headerBuffer[9]) &&
(sum >> 4) == c2i(headerBuffer[8])) {
// 有效头数据,准备接收帧数据
strncpy((char _)frameSizeBuffer, (char _)headerBuffer, 8);
frameSizeBuffer[9] = '\0';
size = atoi((char _)frameSizeBuffer);
// Serial.printf("valid header frame size: %d bytes\n", size);
} else {
// 无效头数据,丢弃
// Serial.printf("invalid header\n");
return;
}

client->write(HEADEROK);
// // Serial.printf("send HEADEROK\n");
cost = millis();
bSize = 0;
if (wifiBuffer == NULL) {
Serial.printf("wifiBuffer is null.\n");
Serial.printf("MALLOC_CAP_8BIT heap_caps_get_largest_free_block: %d.\n",
heap_caps_get_largest_free_block(MALLOC_CAP_8BIT));
Serial.printf("MALLOC_CAP_32BIT heap_caps_get_largest_free_block: %d.\n",
heap_caps_get_largest_free_block(MALLOC_CAP_32BIT));
Serial.printf("MALLOC_CAP_SPIRAM heap_caps_get_largest_free_block: %d.\n",
heap_caps_get_largest_free_block(MALLOC_CAP_SPIRAM));
Serial.printf("MALLOC_CAP_8BIT: %d.\n",
heap_caps_get_free_size(MALLOC_CAP_8BIT));
Serial.printf("MALLOC_CAP_32BIT: %d.\n",
heap_caps_get_free_size(MALLOC_CAP_32BIT));
Serial.printf("MALLOC_CAP_SPIRAM: %d.\n",
heap_caps_get_free_size(MALLOC_CAP_SPIRAM));
} else {
bSize = client->readBytes(wifiBuffer, size);
Serial.printf("frame size: %d bytes, receive frame cost:%d ms\n", bSize,
millis() - cost);
}

if (bSize > 64 && bSize == size) {
cost = millis();
Tft->startWrite();
TJpgDec.drawJpg(0, 0, wifiBuffer, bSize);
Tft->endWrite();
frame_count++;
sec = millis() / 1000;
if (psec != sec) {
psec = sec;
fps = frame_count;
fps_avg = (fps_avg + fps) / 2.0;
frame_count = 0;
}

    // 31ms
    Serial.printf("draw cost:%d ms\n", millis() - cost);

} else {
// 无效帧,丢弃
// return;
}
client->write(FRAMEOK);
// // Serial.printf("send FRAMEOK\n");
}
##ifndef LIB*UTILS_H*
##define LIB*UTILS_H*

##include <stdint.h>
##include "TFT_eSPI.h"

int checkSum(const char\* src, int length);
int c2i(char ch);

int getTextWidth(const char\* text, TFT_eSprite &sprite);

int getTextWidth(const char* text, TFT_eSprite *sprite);
##endif
##include "utils.h"

/\*\*

- @brief 计算16校验和计算
- @param src 待校验内容
- @param length 待校验内容长度
- @retval 校验和
- */
  int checkSum(const char *src, int length) {
  int16_t sum = 0;
  for (int i = 0; i < length; i++) {
  sum += src[i];
  }
  sum = (sum & 0xff) + (sum >> 16);
  return ~sum & 0xff;
  }

/\*\*

- @brief 16进制字符转int
- @param ch 待转换内容
- @retval 校验和
- \*/
  // https://www.cnblogs.com/lidabo/p/3995055.html
  int c2i(char ch) {
  // 如果是数字,则用数字的ASCII码减去48, 如果ch = '2' ,则 '2' - 48 = 2
  if (isdigit(ch)) return ch - 48;

// 如果是字母,但不是A~F,a~f则返回
if (ch < 'A' || (ch > 'F' && ch < 'a') || ch > 'z') return -1;

// 如果是大写字母,则用数字的ASCII码减去55, 如果ch = 'A' ,则 'A' - 55 = 10
// 如果是小写字母,则用数字的ASCII码减去87, 如果ch = 'a' ,则 'a' - 87 = 10
if (isalpha(ch)) return isupper(ch) ? ch - 55 : ch - 87;

return -1;
}

int getTextWidth(const char\* text, TFT_eSprite &sprite){
return sprite.textWidth(text);
}

int getTextWidth(const char* text, TFT_eSprite *sprite){
return sprite->textWidth(text);
}
在 PC(发送端),Python 脚本正好是 C++ 逻辑的‘反面’。它使用 mss 抓屏,用 cv2.imencode 将其压缩成 JPG(这是降低带宽的关键),然后等待 ESP32 的‘握手信号’,并相应地发送‘头部’和‘帧数据’.
##pragma GCC optimize("O3")
##include <stdint.h>

##include <TFT_eSPI.h>
##include <TJpg_Decoder.h>
##include <WiFi.h>
##include <Wire.h>
##include "StreamingComponent.h"

// 第三方基础组件
// WiFi客户端实例
WiFiClient client;
// 显示屏驱动实例
TFT_eSPI Tft = TFT_eSPI();

// 自定义对象
StreamingComponent \*streaming;

bool drawCallback(int16_t x, int16_t y, uint16_t w, uint16_t h,
uint16_t \*bitmap) {
streaming->drawCallBack(x, y, w, h, bitmap);
return true;
}

void main_setup() {
// 配置串口
Serial.begin(115200);
// 配置显示
Tft.init();
Tft.setRotation(1);
Tft.fillScreen(TFT_BLACK);
Tft.initDMA();
// 配置TJpeg
TJpgDec.setJpgScale(1);
TJpgDec.setSwapBytes(true);
// 设置TJpg解码器回调函数
TJpgDec.setCallback(drawCallback);
// 配置WiFi
client.setTimeout(1);
WiFi.begin(ssid, password);
delay(1000);
if (WiFi.status() == WL_CONNECTED) {
const int httpPort = 715;
client.connect("192.168.10.207", httpPort);
Serial.println("Socket Connected");
}

    // 用户自定义对象初始化区
    streaming = new StreamingComponent(client, Tft);
    streaming->status = RUNNING;

}

void setup() {
main_setup();
}

void loop() {
streaming->loop();
}
import socket
import time
from multiprocessing import Process, Queue,Value,Manager
from multiprocessing.sharedctypes import Array
import ctypes
from mss.tools import to_png
import cv2
import lzo
import mss
import numpy as np

ip = "0.0.0.0"
port = 715
fps = 0

def main():
global fps # 1. 创建套接字 socket
if True:
tcp_server_socket = socket.socket(socket.AF_INET, socket.SOCK_STREAM) # 2. 绑定本地信息 bind
tcp_server_socket.bind((ip, port)) # 3. 让默认的套接字由主动变为被动 listen
tcp_server_socket.listen(128)
print("启动TCP服务器\r\n" + f'启动在{ip}:{port}上') # 4. 等待客户端的链接 accept
print("等待客户端的链接\r\n")
new_client_socket, client_addr = tcp_server_socket.accept()
print(f'当前链接:{client_addr}')
frame_buffer = grab_screen_to_buffer(0, 0, 1920, 1080)
start_time = time.time()
while True:
s = time.time()
recv = new_client_socket.recv(1)
if recv == b'\x41': # 客户端就绪,发送头数据
start_time = time.time()
header = len(frame_buffer.tobytes())
header = package_header(header)
new_client_socket.sendall(header)
end_time = time.time()
cost = end_time - start_time # print("客户端就绪,发送头数据")
elif recv == b'\x02': # 客户端准备头部接收完成,发送帧数据
new_client_socket.sendall(frame_buffer.tobytes())
frame_buffer = grab_screen_to_buffer(0, 0, 1920, 1080) # print("客户端准备头部接收完成,发送帧数据")
elif recv == b'\x01': # pass # 客户端准备帧数据接收完成,等待客户端就绪 # print("客户端准备帧数据接收完成,等待客户端就绪")
end_time = time.time()
cost = end_time - start_time
print("Backend FPS:{:.2f}".format(1.0 / cost))

### grab screen by left top width height

def grab_screen_to_buffer(l, t, w, h):
monitor = {"top": t, "left": l, "width": w, "height": h}
with mss.mss() as sct:
sct_frame = sct.grab(monitor)
img = np.array(sct_frame)
img = cv2.resize(img, dsize=(240, 135)) # img = cv2.cvtColor(img, cv2.COLOR_BGR2BGR565) # print("bmp no comporess size:{}",len(img.tobytes())) # print("bmp lzo comporess size:{}",len(lzo.compress(img.tobytes(), 9, False)))
quality = 60
encode_params = [cv2.IMWRITE_JPEG_QUALITY,quality,cv2.IMWRITE_JPEG_PROGRESSIVE,0]
retval, img = cv2.imencode(".jpg", img, encode_params) # with open("write.jpg", "wb") as f: # f.write(img.tobytes()) # img = img[..., ::-1] # print("jpg no comporess size:{}",len(img.tobytes())) # print("jpg lzo comporess size:{}",len(lzo.compress(img.tobytes(), 9, False)))
return img

def package_header(size):
data = num_package(size)
header = ''.join(data).encode() + hex(check_sum(data)).encode()[2:]
return header

## 校验和

def check_sum(value):
s = 0
for d in value:
s += ord(d)
s = (s & 0xff) + (s >> 16)
return ~s & 0xff

## 打包数字

def num*package(num):
if num < 100000000:
li_str = list(str(num))
result = ['0' for * in range(8)]
for index, item in zip(range(len(li*str)), li_str):
result[-index + len(li_str) - 1] = item
return result[::-1]
else:
return ['9' for * in range(6)]

if **name** == '**main**':
time.sleep(1)
main()
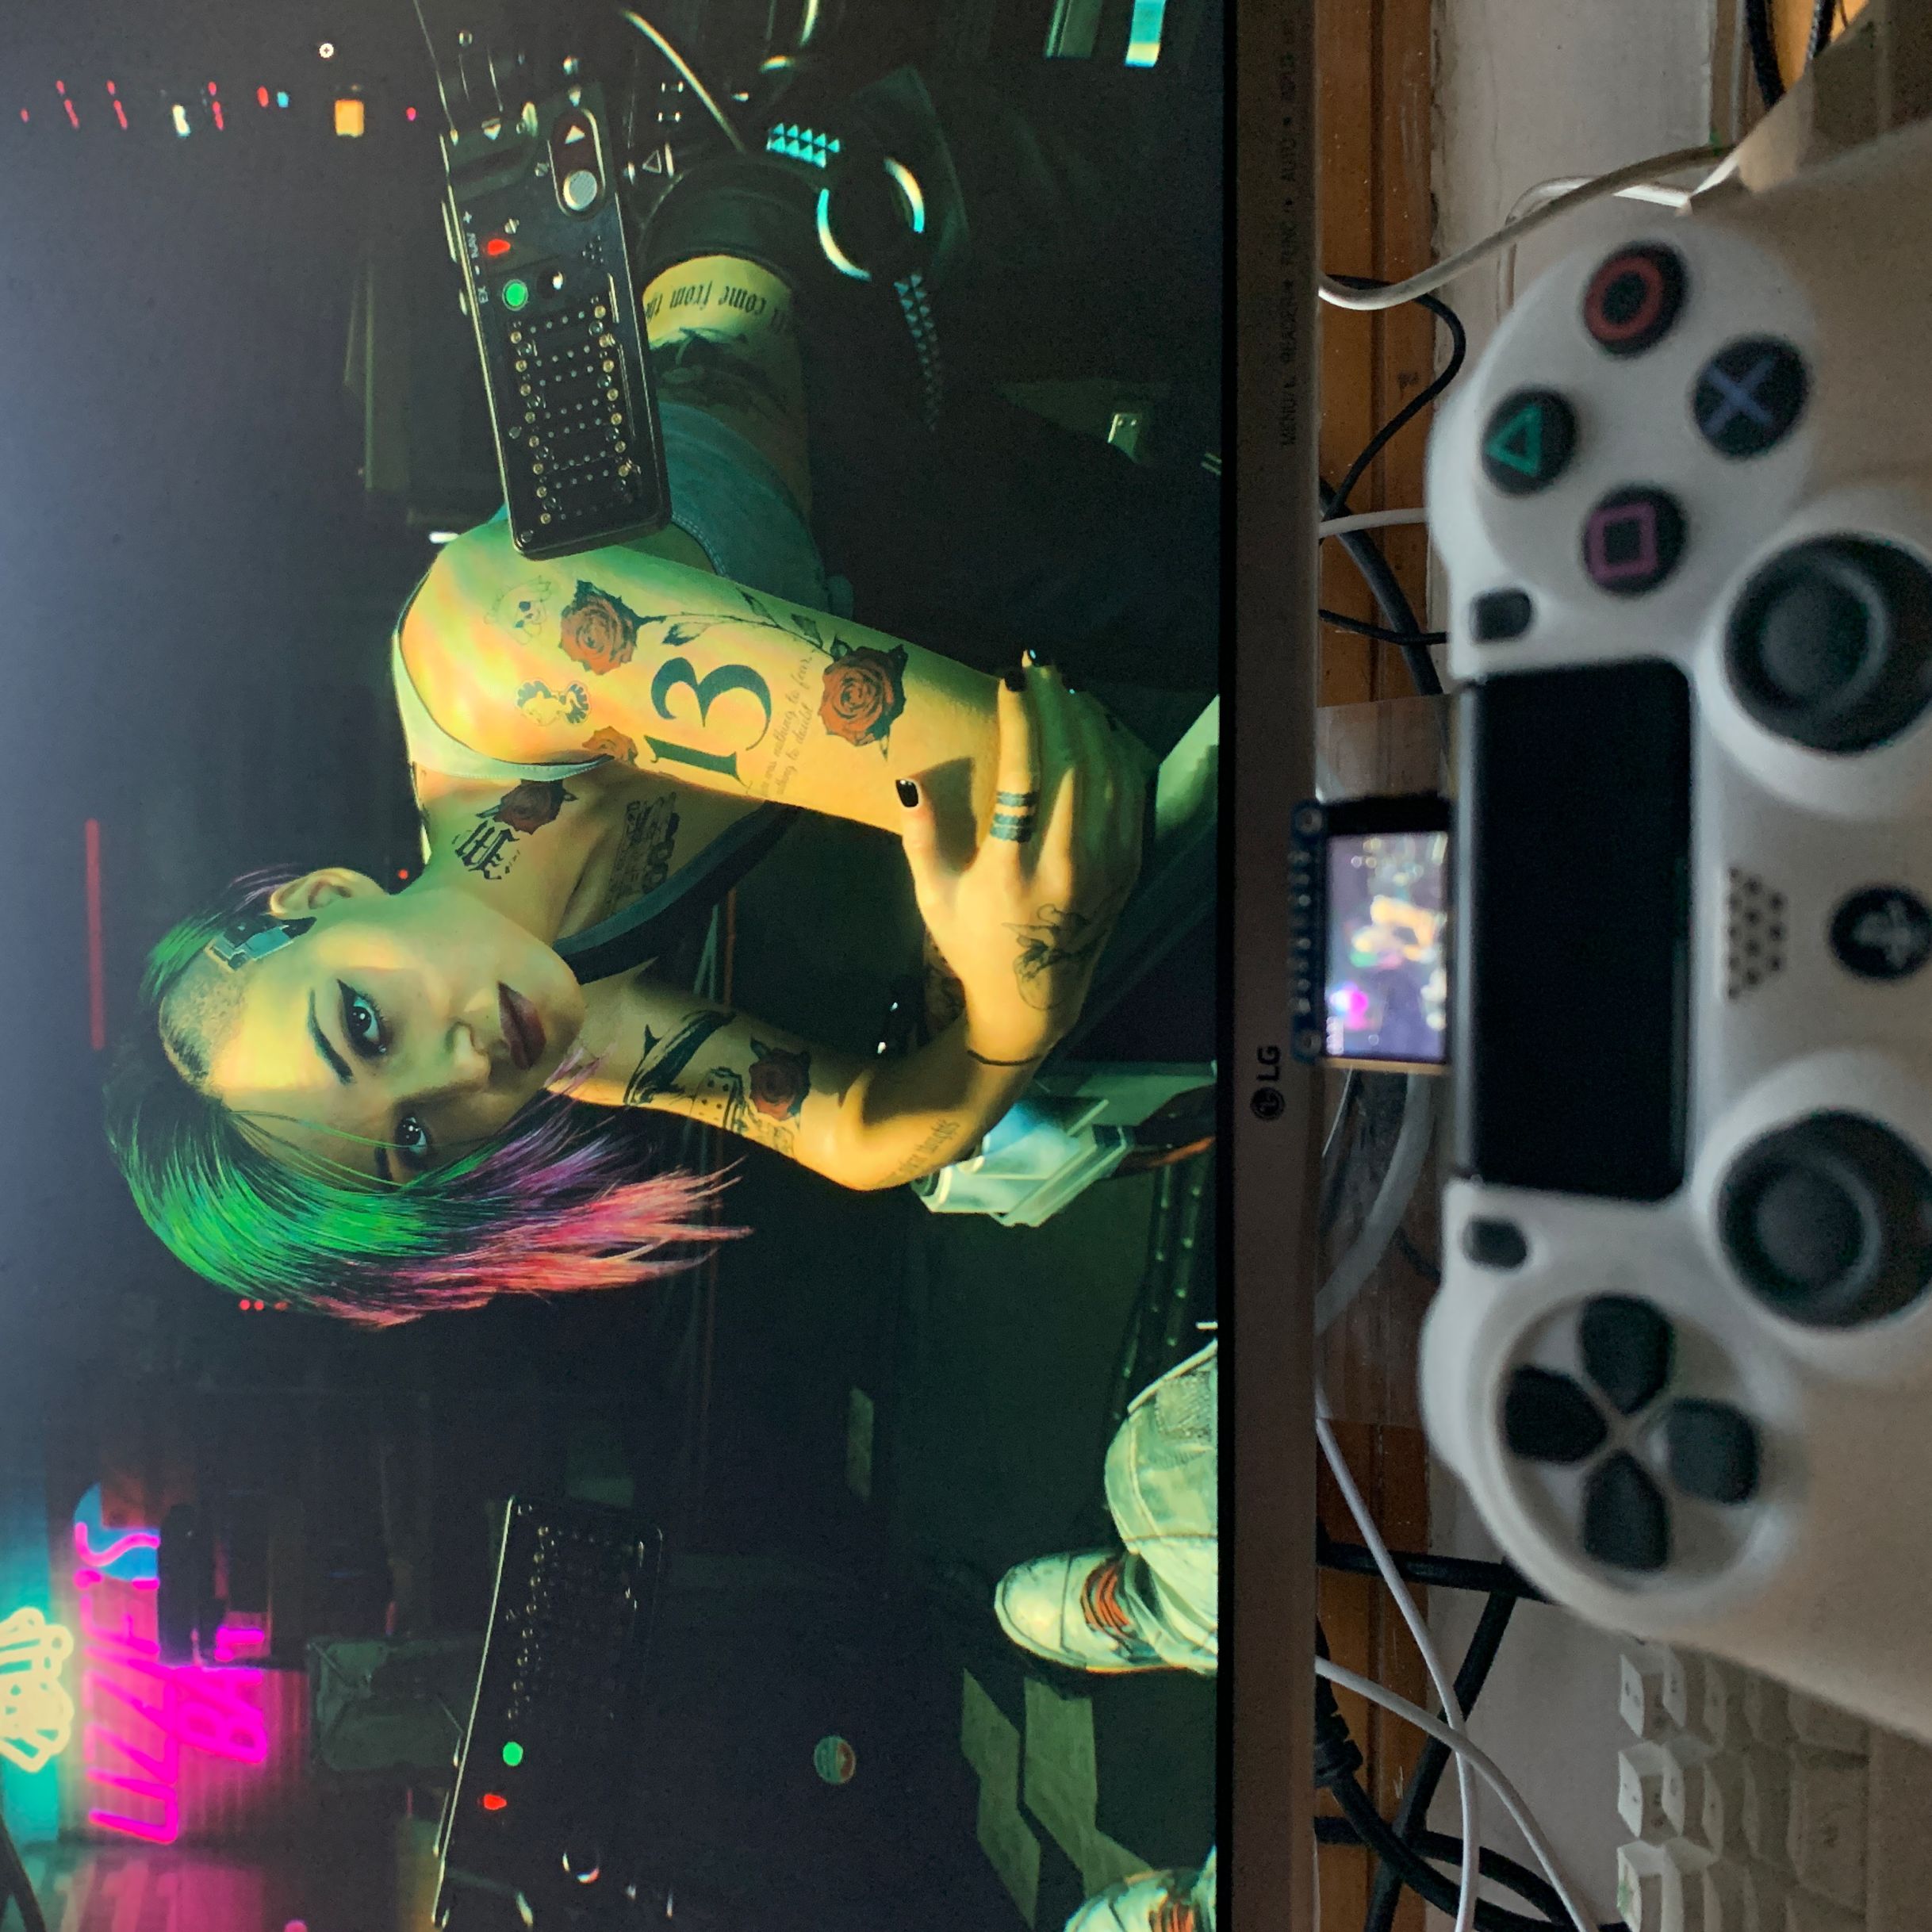
预览
参考资料
以下内容为实际开发中参考过的资料,有些资料中的方案已经舍弃,并未体现在上述代码中,特此列出,但俺仍要向他们表示由衷的感谢。
- windows环境安装lzo和python-lzo
- https://github.com/lzfcc/LearnArduino
- ESP32 官方文档(五)严重错误
- ESP32-CAM: 連接ILI9341液晶螢幕