Train your own YOLO-tiny model
0x01 What is YOLO
YOLO is a real-time target detection system. In layman’s terms, it searches for specific targets in input data (pictures or videos). For example, if you let a YOLO model that specializes in recognizing dragons watch “Game of Thrones”, ideally, once a dragon appears in the picture, the YOLO system will excitedly mark the dragon in the picture with a frame.
Why YOLO-tiny
Perhaps poverty has limited my computing speed. YOLO-tiny trades precision for the advantages of fast speed and low performance requirements. It is suitable for users who practice and learn, or just play around like me.
0x02 Preparation beforehand
First of all, you may need a computer (some users may abuse themselves by using a Raspberry Pi or even an Android user with a Linux emulator installed). My CPU is the fourth-generation ES version of i7, I don’t know what to call it. The graphics card is an ancient GTX860M, and the memory is only 8G. It is truly a low-configuration user. By the way, this computer will have a green screen N times a day. I will record the number of green screens from now on until the completion of this article. By the way, this is a second-generation machine. Because the larger machine uses an AMD mining card, the GPU cannot be used to accelerate TensorFlow training. By the way, although the roommate next to me has a 1070Ti, he needs to use his computer to play Landlords, so he cannot help me run the training model. Back to the main thread, you also need to have some common sense…the kind of common sense that allows you to use search engines.
0x03 Preparation in advance
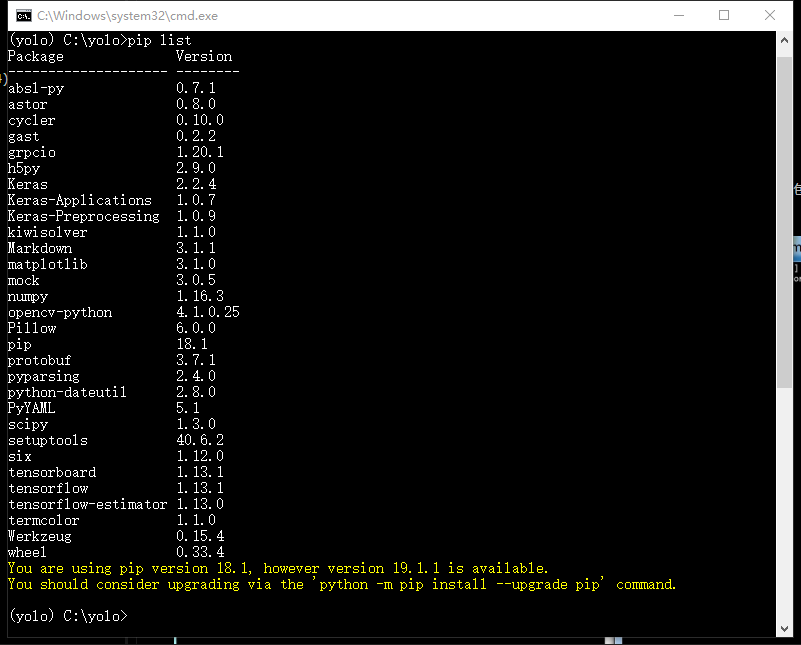
It is assumed here that you have installed Python and have some “common sense”, you can continue reading. For the convenience of demonstration, I used Python’s virtual environment and installed the following libraries
- To download the file on the https://github.com/qqwweee/keras-yolo3 page, you can use git clone or click download directly, and then unzip it.
- Download the weights file of yolo-tiny https://pjreddie.com/media/files/yolov3-tiny.weights, and put it in the folder extracted in the previous step At this point, half of the files we need to use next have been prepared, and the other half is the data needed to run the model.
0x04 Configuration related files
First, we need to edit yolov3-tiny.cfg, In this file, we need to pay attention to [yolo] and the [convolutional] before [yolo] First change all the classes in [yolo] to 1 get classes=1 The meaning of classes is how many types of objects need to be recognized. Here I only train yolo to recognize one type of object, so set it to 1
Modify the filters in the previous [convolutional] of all [yolo] Its value is filters = 3 * ( classes + 5 ). Since classes=1 in the previous step, the filters here are 18. At this point, yolov3-tiny.cfg has been modified. Then modify coco_classes.txt and voc_classes.txt in model_data and fill in the labels of the objects to be detected, with each label occupying one line. Since I only have one type of object to recognize, there is only one word in both files Enter the directory where yolo is located and run
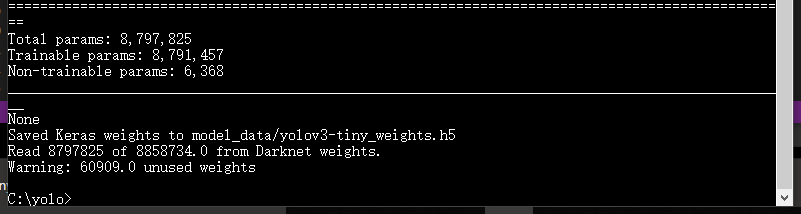
python convert.py -w yolov3-tiny.cfg yolov3-tiny.weights model_data/tiny_yolo_weights.h5After the conversion is completed, you can see the content as shown in the figure
0x05 Of course it is the production data, DIO
How to make data… I wrote ImgTag to label the data, and used the data generated by ImgTag during the training process.
0x06 Training model
Before training our own model, we also need to edit the content in train.py
- anchors_path = ‘model_data/tiny_yolo_anchors.txt’ specifies anchors as the tiny-yolo version
- Because I already know clearly that I am training a yolo-tiny model, so on line 27, change it to is_tiny_version = True It can be executed at this time
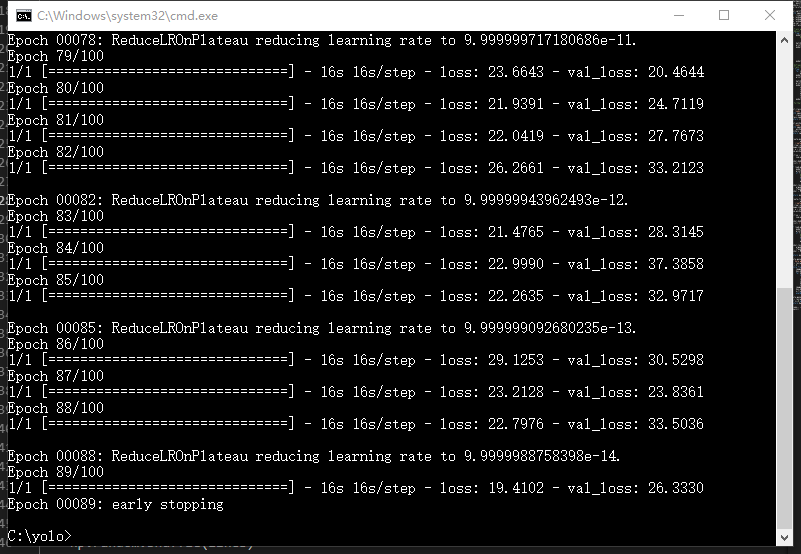
python train.pyAfter a long wait, the model is finished running. After running, similar content will be displayed.
0x07 Use model
Using the model means specifying that yolo uses the weight file we just generated (maybe not just) when detecting the target. Enter the yolo directory and edit yolo.py What needs to be focused on is the
_defaults = {
"model_path": 'model_data/yolo.h5', # 指定使用的模型
"anchors_path": 'model_data/yolo_anchors.txt',
"classes_path": 'model_data/coco_classes.txt',
"score" : 0.3, # 当评估出的得分大于0.3时候,就标记出来
"iou" : 0.45,
"model_image_size" : (416, 416),
"gpu_num" : 1,
}
We need to modify the value of the following model_path. Because…for some special reasons, the model cannot be specified when I run it, so I use this method. Modify the line of model_path to
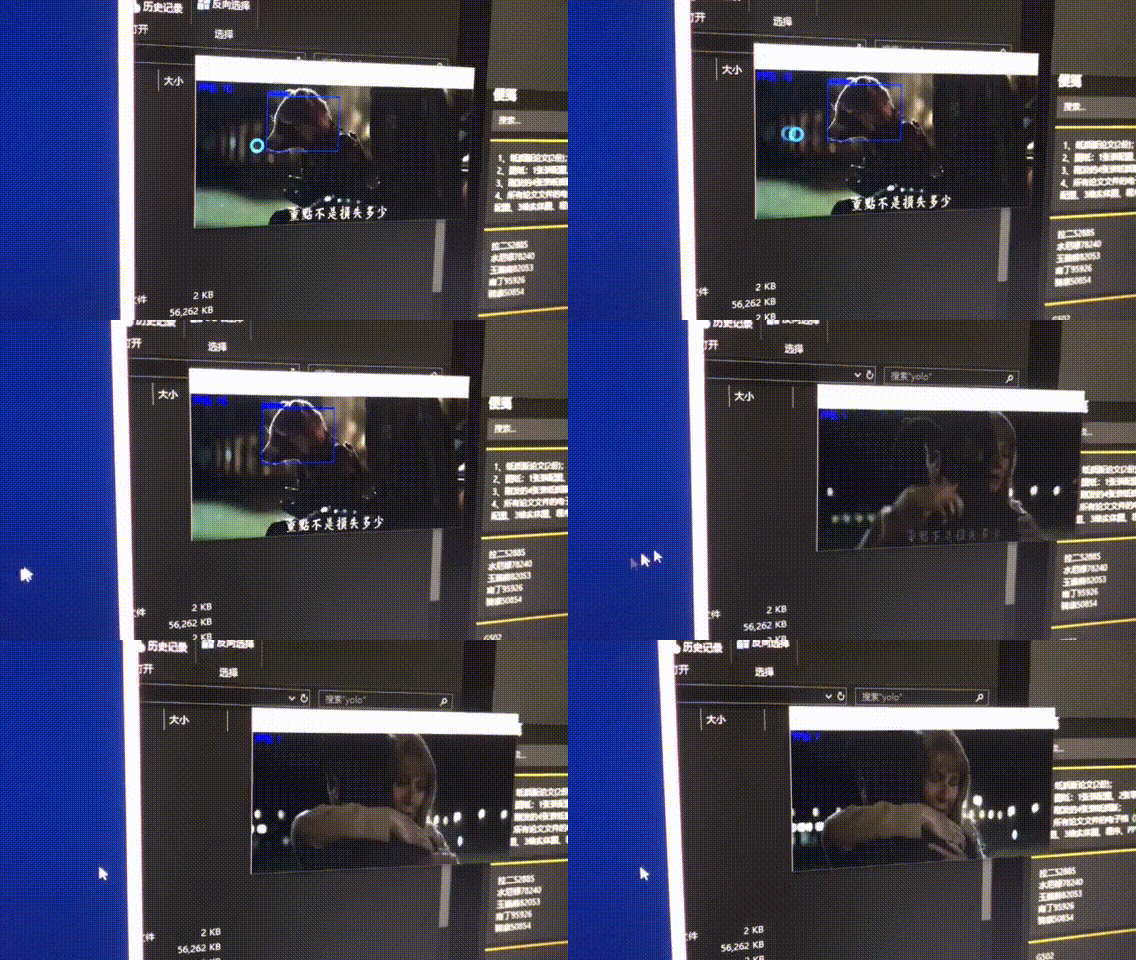
"model_path": 'logs/000/trained_weights_final.h5',I have marked a total of 200 pictures. Relatively speaking, the number of pictures may not be enough, but you can already see that the current model can recognize some raccoons normally. Like Rocket Raccoon in Guardians of the Galaxy