Port FFmpeg to Android
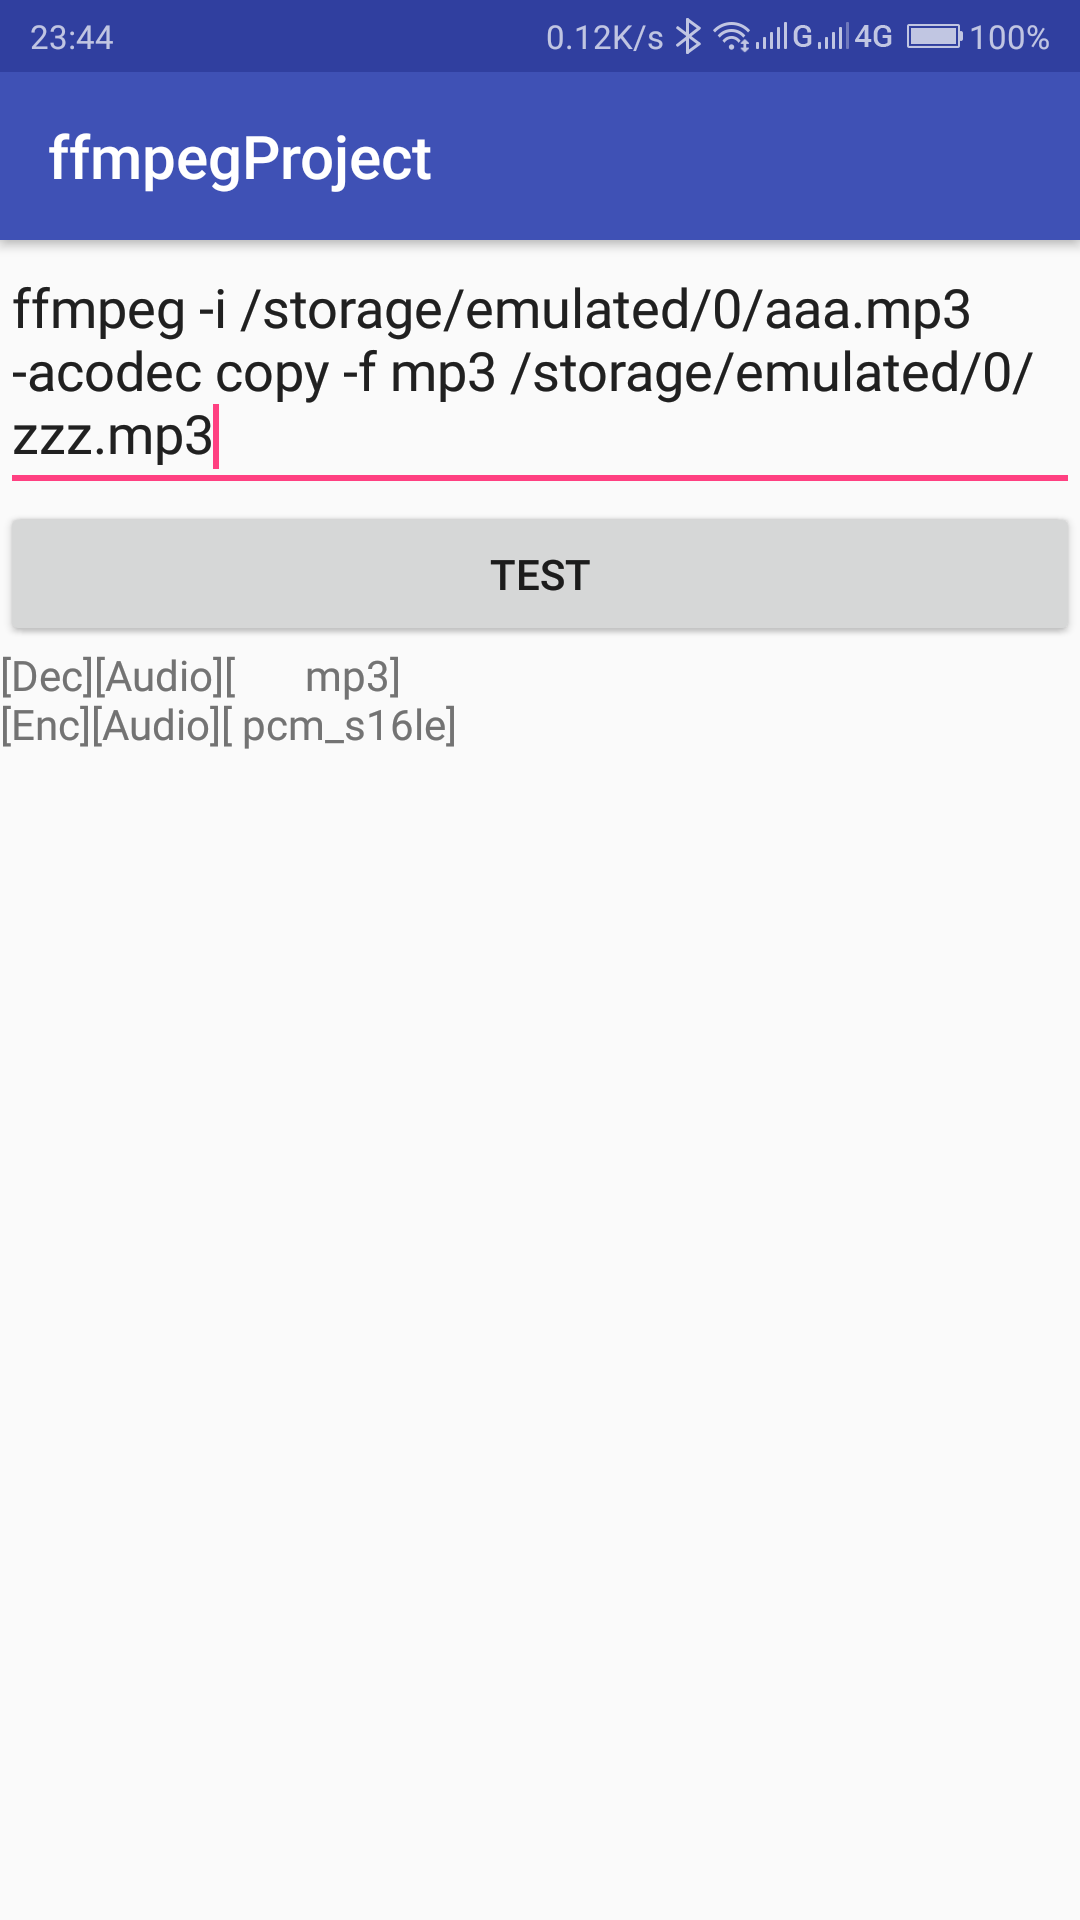
Because of Mix Music decoding requirements, we have to choose a suitable decoding tool. I tried 4 decoding methods, and in the end FFmpeg worked best
- MediaCodec cooperates with MediaExtractor to perform decoding operations
- In this case, by default, MediaExtractor only transfers about 1KB of data to MediaCodec at a time, which is too slow.
- MediaCodec does not need to be decoded by MediaExtractor
- After filling the Bytbuffer with data, MediaCodec always makes errors when processing the data, probably because the non-frame data part is not skipped.
- Use LAME for decoding operation
- Unfortunately, hip_decode() in LAME can only process frame data, and non-frame data needs to be manually skipped. When non-frame data is manually skipped, it is finally found that the speed has not improved much (even though buffers of different sizes have been set)
- Use FFmpeg for decoding operations
- There are really various errors during compilation. The header file is clearly there and there, but the compiler still reports an error that the function cannot be found. Fortunately, the final effect is very satisfactory, decoding an audio file in 3 seconds.
This is the GitHub address of the project. If your ffmpeg really cannot be compiled, you can download it here and then compile it.
Compile the so file of ffmpeg
To compile FFmpeg, the first step is to obtain the source code. Go directly to Official website to download it. Obtained after decompression
└───ffmpeg
    ├───compat
    ├───doc
    ├───ffbuild
    ├───ffmpeg
    ├───fftools
    ├───libavcodec
    ├───libavdevice
    ├───libavfilter
    ├───libavformat
    ├───libavresample
    ├───libavutil
    ├───libpostproc
    ├───libswresample
    ├───libswscale
    ├───presets
    ├───tests
    └───tools
Open the configure file and find
SLIBNAME_WITH_MAJOR='$(SLIBNAME).$(LIBMAJOR)'
LIB_INSTALL_EXTRA_CMD='$$(RANLIB) "$(LIBDIR)/$(LIBNAME)"'
SLIB_INSTALL_NAME='$(SLIBNAME_WITH_VERSION)'
SLIB_INSTALL_LINKS='$(SLIBNAME_WITH_MAJOR) $(SLIBNAME)'
Modify the content to
SLIBNAME_WITH_MAJOR='$(SLIBPREF)$(FULLNAME)-$(LIBMAJOR)$(SLIBSUF)'
LIB_INSTALL_EXTRA_CMD='$$(RANLIB) "$(LIBDIR)/$(LIBNAME)"'
SLIB_INSTALL_NAME='$(SLIBNAME_WITH_MAJOR)'
SLIB_INSTALL_LINKS='$(SLIBNAME)'
This is because the version number in the file name generated by default is at the end, which does not comply with the Android naming convention.
Create the build.sh file in the ffmpeg directory The content is
NDK=F:/android-ndk-r14b
## 指向你NDK的路径
SYSROOT=$NDK/platforms/android-21/arch-arm/
## 指定逻辑目录,按照自身需要进行修改
TOOLCHAIN=$NDK/toolchains/arm-linux-androideabi-4.9/prebuilt/windows-x86_64
## windows平台为windows-x86_64,linux为linux-x86_64
CPU=arm
PREFIX=$(pwd)/android/$CPU
ADDI_CFLAGS="-marm"
## build_one中,因为我只需要使用mp3的decode和pcm_s16le的encode,所以关闭了其他的decode和encode来实现压缩体积,集体配置参数可参考
## https://www.cnblogs.com/azraelly/archive/2012/12/31/2840541.html
function build_one
{
./configure \
--prefix=$PREFIX \
--enable-shared \
--disable-static \
--enable-asm \
--disable-doc \
--disable-gpl \
--enable-small \
--disable-encoders \
--disable-decoders \
--disable-ffmpeg \
--enable-encoder=pcm_s16le \
--enable-decoder=mp3 \
--disable-ffplay \
--disable-ffprobe \
--disable-ffserver \
--disable-doc \
--disable-symver \
--enable-jni \
--cross-prefix=$TOOLCHAIN/bin/arm-linux-androideabi- \
--target-os=android \
--arch=arm \
--enable-cross-compile \
--sysroot=$SYSROOT \
--extra-cflags="-Os -fpic $ADDI_CFLAGS" \
--extra-ldflags="$ADDI_LDFLAGS" \
$ADDITIONAL_CONFIGURE_FLAG
make clean
make
make install
}
build_one
What’s even more unfortunate is that the .sh file cannot be run now. You must download MinGW first. Remember to not leave the build.sh file open in the background when you are not editing it. After downloading, open it directly Check the options as shown in the picture above
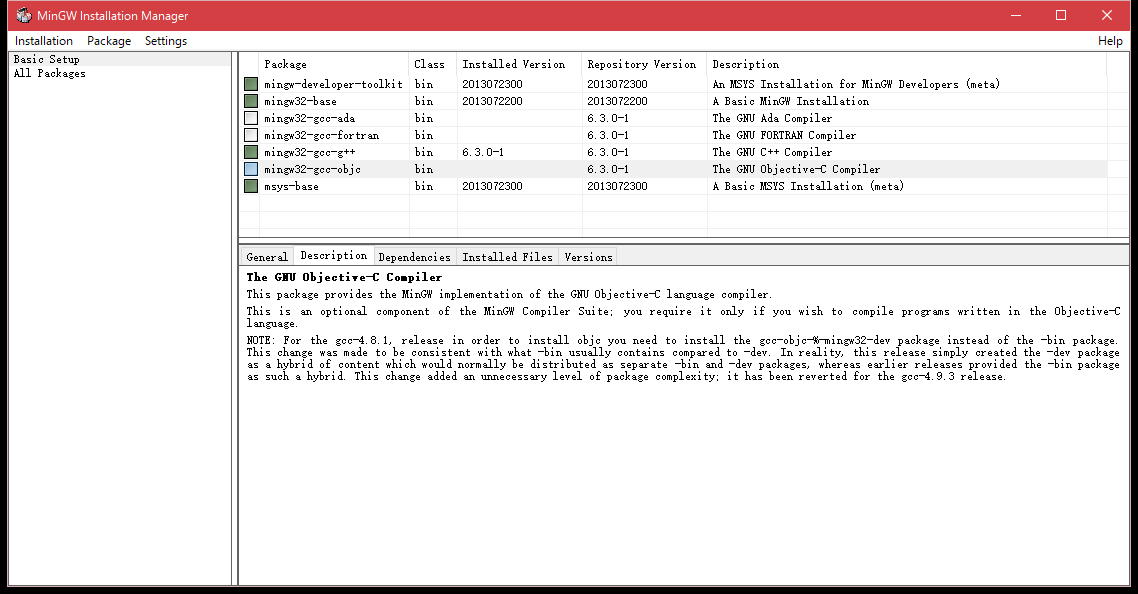
Click Apply Changes in the Installation menu in the upper left corner, then wait for downloading and automatic installation (you may need sour milk because the network quality is not very high)
After downloading, go directly to your MinGW folder, find the msys folder and enter it. Double-click msys.bat to start a long program that looks like CMD. At least on the opening path, use the cd command.
cd into the folder of the previous build.sh, enter ./build.sh to run build.sh, and it will automatically compile. If you encounter various strange problems, don’t give up, because your problems have been made by others before, you just need to make good use of search engines and follow in their footsteps.
Because I also encountered various problems when compiling, and finally solved the problem by changing the NDK version. After waiting for a period of time, there will be an android folder in the ffmpeg directory. The so file we need to use is in this ffmpeg/android/arm/lib folder.
After compilation is complete we get
include
lib
    libavcodec.so
    libavdevice.so
    libavfilter.so
    libavformat.so
    libavutil.so
    libpostproc.so
    libswresample.so
    libswscale.so
Compile so files that can be called by Android
Finally it’s time to call FFmpeg. Just like the requirements for regular NDK compilation, you need to create a jni folder. Copy the include folder and those so files obtained in the previous step.
You also need to put the file located in the ffmpeg root directory
- cmdutils.c and cmdutils.h
- ffmpeg.h and ffmpeg.c
- ffmpeg_opt.c
- ffmpeg_hw.c
- ffmpeg_filter.c
- va_copy.h
- config.h is a file you can only get if you manually compiled ffmpeg before. Also copied to the jni folder
Create Application.mk
APP_ABI := armeabi-v7a armeabi
APP_MODULES := libffmpegjni
APP_CFLAGS += -DSTDC_HEADERS
and Android.mk
LOCAL_PATH:= $(call my-dir)

include $(CLEAR_VARS)
LOCAL_MODULE:= avcodec-prebuilt-armeabi
LOCAL_SRC_FILES:= prebuilt/armeabi/libavcodec.so
include $(PREBUILT_SHARED_LIBRARY)

include $(CLEAR_VARS)
LOCAL_MODULE:= avdevice-prebuilt-armeabi
LOCAL_SRC_FILES:= prebuilt/armeabi/libavdevice.so
include $(PREBUILT_SHARED_LIBRARY)

include $(CLEAR_VARS)
LOCAL_MODULE:= avfilter-prebuilt-armeabi
LOCAL_SRC_FILES:= prebuilt/armeabi/libavfilter.so
include $(PREBUILT_SHARED_LIBRARY)

include $(CLEAR_VARS)
LOCAL_MODULE:= avformat-prebuilt-armeabi
LOCAL_SRC_FILES:= prebuilt/armeabi/libavformat.so
include $(PREBUILT_SHARED_LIBRARY)

include $(CLEAR_VARS)
LOCAL_MODULE :=  avutil-prebuilt-armeabi
LOCAL_SRC_FILES := prebuilt/armeabi/libavutil.so
include $(PREBUILT_SHARED_LIBRARY)

include $(CLEAR_VARS)
LOCAL_MODULE := swresample-prebuilt-armeabi
LOCAL_SRC_FILES := prebuilt/armeabi/libswresample.so
include $(PREBUILT_SHARED_LIBRARY)

include $(CLEAR_VARS)
LOCAL_MODULE := swscale-prebuilt-armeabi
LOCAL_SRC_FILES := prebuilt/armeabi/libswscale.so
include $(PREBUILT_SHARED_LIBRARY)

include $(CLEAR_VARS)

LOCAL_MODULE := libffmpegjni

LOCAL_ARM_MODE := arm

LOCAL_SRC_FILES := ffmpegJni.c \
                   ffmpeg.c \
                   cmdutils.c \
                   ffmpeg_opt.c \
                   ffmpeg_filter.c \
                   ffmpeg_hw.c

LOCAL_LDLIBS := -L$(SYSROOT)/usr/lib -llog -lz

LOCAL_SHARED_LIBRARIES:= avcodec-prebuilt-armeabi \
                         avdevice-prebuilt-armeabi \
                         avfilter-prebuilt-armeabi \
                         avformat-prebuilt-armeabi \
                         avutil-prebuilt-armeabi \
                         swresample-prebuilt-armeabi \
                         swscale-prebuilt-armeabi

LOCAL_C_INCLUDES += -L$(SYSROOT)/usr/include
LOCAL_C_INCLUDES += $(LOCAL_PATH)/include

LOCAL_CFLAGS := -DUSE_ARM_CONFIG

include $(BUILD_SHARED_LIBRARY)
There are some things in ffmpeg.c that we need to modify, because under normal circumstances ffmpeg will automatically exit when it executes a command. Of course we don’t want this. So we need to process its exit operation. Open ffmpeg.c, find the following content and modify it
/* parse options and open all input/output files */
    ret = ffmpeg_parse_options(argc, argv);
    if (ret < 0){
        // exit_program(1);
        return 1;
    }

    if (nb_output_files <= 0 && nb_input_files == 0) {
        show_usage();
        av_log(NULL, AV_LOG_WARNING, "Use -h to get full help or, even better, run 'man %s'\n", program_name);
        // exit_program(1);
        return 1;
    }

    /* file converter / grab */
    if (nb_output_files <= 0) {
        av_log(NULL, AV_LOG_FATAL, "At least one output file must be specified\n");
        //exit_program(1);
        return 1;
    }

    if (nb_input_files == 0) {
        av_log(NULL, AV_LOG_FATAL, "At least one input file must be specified\n");
        //exit_program(1);
        return 1;
    }
Add the following content to the end of the static void ffmpeg_cleanup(int ret) function
    ffmpeg_exited = 1;
    nb_filtergraphs = 0;
    nb_output_files = 0;
    nb_output_streams = 0;
    nb_input_files = 0;
    nb_input_streams = 0;
In order to obtain the processing progress of ffmpeg Modify the log_callback_null function content to be
static void log_callback_null(void *ptr, int level, const char *fmt, va_list vl)
{
    static int print_prefix = 1;
    static int count;
    static char prev[1024];
    char line[1024];
    static int is_atty;
    av_log_format_line(ptr, level, fmt, vl, line, sizeof(line), &print_prefix);
    strcpy(prev, line);
    if (level <= AV_LOG_WARNING){
        XLOGE("%s", line);
    }else{
        XLOGD("%s", line);
        callJavaMethod(line);// 调用java方法,反馈进度
    }
}
And add it at the beginning of the main function
av_log_set_callback(log_callback_null);Open cmdutils.c again and modify exit_program. Don’t forget to modify exit_program in the header file.
int exit_program(int ret)
{
     return ret;
}
Then create a file called ffmpegJni.c and its header file ffmpegJni.h
##include "logjni.h"
##include "ffmpegJni.h"
##include <stdlib.h>
##include <stdbool.h>

int main(int argc, char **argv);
static JavaVM *jvm = NULL;
static jclass m_clazz = NULL;
static jclass m_jobj = NULL;
static JNIEnv *m_env = NULL;
// 注意这里的Java_com_chaosgoo_ffmpegproject_ffmpegJni_main,请按照你的项目名称进行修改
JNIEXPORT jint JNICALL Java_com_chaosgoo_ffmpegproject_ffmpegJni_main(JNIEnv *env, jclass obj, jobjectArray commands){
    (*env)->GetJavaVM(env, &jvm); //获取JVM虚拟机
    jclass clazz = (*env)->GetObjectClass(env,obj);  //获取调用此方法的java类
    m_jobj = obj;
    m_clazz = (*env)->NewGlobalRef(env, clazz); //将这个类赋值给m_clazz
    m_env = env; //复制到全局变量m_env
    int argc = (*env)->GetArrayLength(env, commands);
    char *argv[argc];
    int i;
    int result = 0;
    for (i = 0; i < argc; i++)
    {
        jstring js = (jstring)(*env)->GetObjectArrayElement(env, commands, i);
        argv[i] = (char *)(*env)->GetStringUTFChars(env, js, 0);
    }
    LOGD("----------begin---------");
    int ret = main(argc, argv);
    ffmpegJniDone(1);
    return ret;
}


void callJavaMethod(char *ret)
{
    int ss = 0;
    char *q = strstr(ret, "time=");
    if (q != NULL)
    {
        //LOGE("遇到time=");
        char str[14] = {0};
        strncpy(str, q, 13);
        int h = (str[5] - '0') * 10 + (str[6] - '0');
        int m = (str[8] - '0') * 10 + (str[9] - '0');
        int s = (str[11] - '0') * 10 + (str[12] - '0');
        ss = s + m * 60 + h * 60 * 60;
    }
    else
    {
        return;
    }

    if (m_clazz == NULL)
    {
        LOGE("---------------m_clazz isNULL---------------");
        return;
    }
    //获取方法ID (I)V指的是方法签名 通过javap -s -public FFmpegCmd 命令生成
    jmethodID methodID = (*m_env)->GetMethodID(m_env, m_clazz, "onProgress", "(I)V");
    if (methodID == NULL)
    {
        LOGE("---------------methodID isNULL---------------");
        return;
    }
     LOGE("---------------Call Method---------------");
    //调用该java方法
    (*m_env)->CallVoidMethod(m_env,m_jobj, methodID, ss);
}

void ffmpegJniDone(int i){
    jmethodID methodID = (*m_env)->GetMethodID(m_env, m_clazz, "onFinish", "(I)V");
    (*m_env)->CallVoidMethod(m_env,m_jobj, methodID, i);
    // 完成任务后的调用java方法,告知其已经完成
}
logjni.h is a header file used to convert ffmpeg’s own output into Android Log output. The content is:
##ifdef ANDROID
##include <android/log.h>
##ifndef LOG_TAG
##define  MY_TAG   "MYTAG"
##define  AV_TAG   "AVLOG"
##endif
##define LOGE(format, ...)  __android_log_print(ANDROID_LOG_ERROR, MY_TAG, format, ##__VA_ARGS__)
##define LOGD(format, ...)  __android_log_print(ANDROID_LOG_DEBUG,  MY_TAG, format, ##__VA_ARGS__)
##define  XLOGD(...)  __android_log_print(ANDROID_LOG_INFO,AV_TAG,__VA_ARGS__)
##define  XLOGE(...)  __android_log_print(ANDROID_LOG_ERROR,AV_TAG,__VA_ARGS__)
##else
##define LOGE(format, ...)  printf(MY_TAG format "\n", ##__VA_ARGS__)
##define LOGD(format, ...)  printf(MY_TAG format "\n", ##__VA_ARGS__)
##define XLOGE(format, ...)  fprintf(stdout, AV_TAG ": " format "\n", ##__VA_ARGS__)
##define XLOGI(format, ...)  fprintf(stderr, AV_TAG ": " format "\n", ##__VA_ARGS__)
##endif
At this step, you can execute the ndk-build command to compile. cmd Enter the jni folder created before, enter ndk-build (don’t forget to configure the ndk environment variable), and the compilation operation will be automatically performed.
If there are still prompts for various missing files, you can find them in the ffmpeg folder you decompressed before, and then copy them to the corresponding folder. Finally, after the compilation is completed, there will be an additional libffmpegjni.so file The next step is to call it on the Android side. Create a FFmpegJni class
public class FFmpegJni {
    private  float totalDecodeTime = 0f;
    private  ProgressBar progressBar;

    private String fileInPath;
    private String fileOutPath;

    MediaPlayer mediaPlayer = new MediaPlayer();

    public FFmpegJni(String inPath, String outPath, ProgressBar progressBar){
        fileInPath = inPath;
        fileOutPath = outPath;
        this.progressBar = progressBar;
    }
    // 初始化相关设定
    public void init(){
        try{
            mediaPlayer.setDataSource(fileInPath);
            mediaPlayer.prepare();
            totalDecodeTime = mediaPlayer.getDuration()/1000;
            Log.d("ffmpeg", "init: "+totalDecodeTime);
        }catch (Exception e){
            e.printStackTrace();
        }
    }
    //执行解码操作
    public void decode(){
        new Thread(new Runnable() {
            @Override
            public void run() {
                String[] cmd = {"ffmpeg", "-i",fileInPath, "-f", "s16be" ,"-ar" ,"44100" ,"-acodec","pcm_s16le", fileOutPath};
                main(cmd);
            }
        }).start();
    }

    // 更新进度条
    public void onProgress(int second) {
        Log.d("ffmpeg", "onProgress: "+ ((second/this.totalDecodeTime) * 100));
        progressBar.setProgress((int)((second/this.totalDecodeTime) * 100));
    }


    // NDK 函数
    public native int main(String[] commands);
    // 导入so文件
    static {
        System.loadLibrary("avutil");
        System.loadLibrary("swresample");
        System.loadLibrary("avcodec");
        System.loadLibrary("avformat");
        System.loadLibrary("swscale");
        System.loadLibrary("avfilter");
        System.loadLibrary("avdevice");
        System.loadLibrary("ffmpegjni");
    }
}
Then just call it in mainacitivity. The main function of FFmpegJni receives the command.