- Implementing variable fonts (Variable Font) in LVGL-Chapter 1
- Implementing variable fonts (Variable Font) in LVGL - Chapter 2
- Implementing variable fonts (Variable Font) in LVGL-Chapter 3
Preface
(November 2025 remastered version description): I published the first version of this article on a third-party platform (Jianshu + Bilibili) and received a total of 50,000+ views and a large number of developer feedback. In order to provide a better reading experience, I have optimized the layout and part of the content of the article and published it exclusively on this personal blog
We have implemented the setting of variable font weight in the simulator environment in Chapter 1.
It’s time to dig out your ESP32 that’s been gathering dust for a long time.
This article will use PlatformIO to create a brand new project until the animation at the end of the previous article is displayed. If you encounter any problems, please refer to FAQ for answers.
Preparation
Software preparation
In order to proceed smoothly with the subsequent content, you need to install VSCode and install the PlatformIO plug-in on VSCode.
Hardware preparation
| Name | Quantity | Remarks | Legend |
|---|---|---|---|
| ESP32 Development Board | 1 | \ | 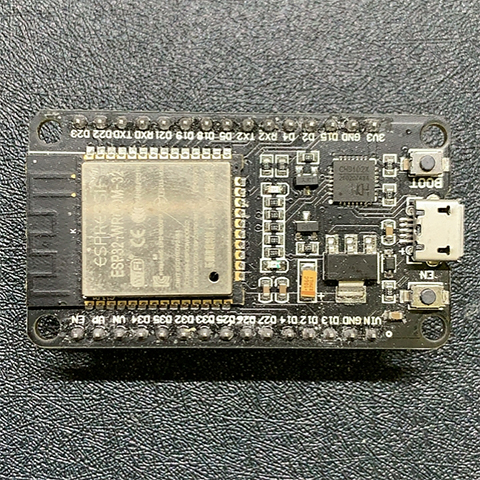 |
| 1.54-inch LCD | 1 | Driver ST7789, resolution 240x240 | 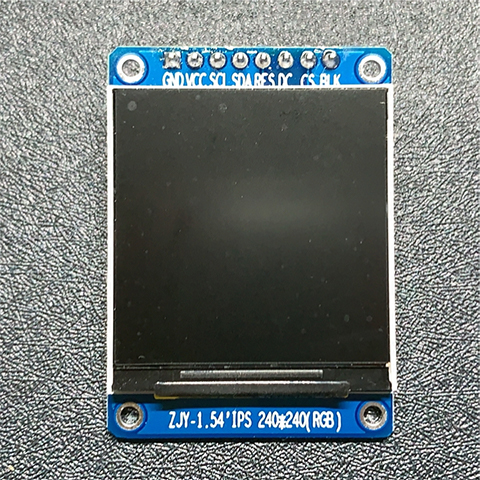 |
| Several Dupont lines | N | \ |  |
Create project
Create a project named lvgl_with_freetype using PlatformIO
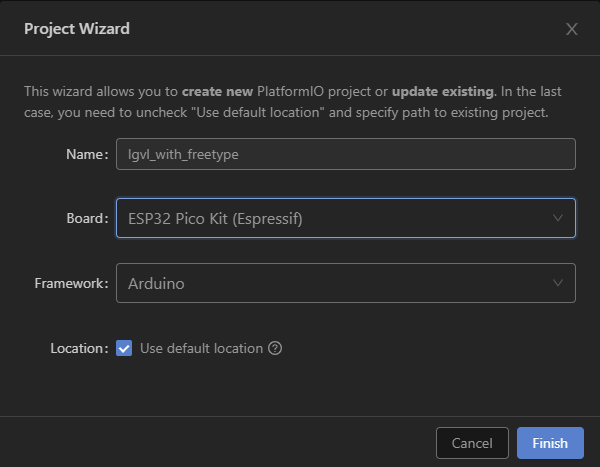 After creation, the directory structure is as follows:
.
├── include
│   └── README
├── lib
│   └── README
├── platformio.ini
├── src
│   └── main.cpp
└── test
    └── README
light up screen
There are a lot of point-screen tutorials on the Internet, so I won’t go into too much detail here.
This driver still uses the TFT_eSPI library, and the screen resolution this time is 240x240, and the Driver IC is ST7789.
So you need to use Setup24_ST7789.h in TFT_eSPI
At the same time, the wiring is changed to
| ESP32 pin name | LCD screen pin name |
|---|---|
| VCC | VCC |
| GND | GND |
| G23 | SDA |
| G18 | SCL |
| G2 | DC |
| G4 | RES |
| GND | CS |
| VCC | BLK |
Corresponds to the content in Setup24_ST7789.h
##define TFT_MISO 19
##define TFT_MOSI 23
##define TFT_SCLK 18
##define TFT_CS -1
##define TFT_DC 2
##define TFT_RST 4
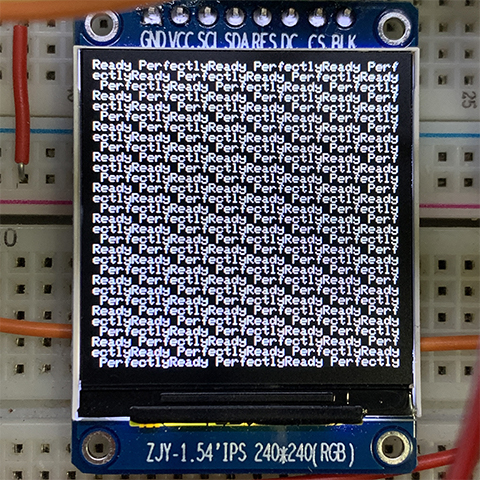
Write something casually and test how the screen lights up.
##include <Arduino.h>
##include <TFT_eSPI.h> // Hardware-specific library
##include <SPI.h>

TFT_eSPI tft = TFT_eSPI(); // Invoke custom library

void setup() {
Serial.begin(115200); // Set to a high rate for fast image transfer to a PC

tft.init();
tft.setRotation(0);
tft.fillScreen(TFT_BLACK);
}

void loop() {
tft.print("Ready Perfectly");
}
Port LVGL
After the screen lights up, you can start transplanting LVGL.
The current time is 2021.12.19, LVGL on GitHubThe latest version is 8.1.1-dev
Use command
git clone https://github.com/lvgl/lvgl.gitAfter obtaining LVGL, copy it to the lib folder. At this time, the file directory is
.
├── include
│   └── README
├── lib
│   └── README
│   └── lvgl
│   └── TFT_eSPI
├── platformio.ini
├── src
│   └── main.cpp
└── test
    └── README
platformio.ini file content
[env:pico32]
platform = espressif32
board = pico32
framework = arduino
monitor_speed = 115200
lib_extra_dirs =
                lib/TFT_eSPI
                lib/lvgl
Modify LVGL configuration file
Create the LVGL configuration file, find lv_conf_templat.h in the lvgl folder, copy a copy of lv_conf_templat.h and rename it to lv_conf.h, and then open lv_conf.h
In order to make the configuration file content effective, find line 15 (the number of lvgl lines in other versions may not be here, you need to find it yourself)
##if 0 /*Set it to "1" to enable content*/Change to
##if 1 /*Set it to "1" to enable content*/Find line 30 and modify the color order
##define LV_COLOR_16_SWAP 0Change to
##define LV_COLOR_16_SWAP 1Find line 49, enable custom memory management
##define LV_MEM_CUSTOM 0Modify to
##define LV_MEM_CUSTOM 1Find line 88 and set a custom periodic function
##define LV_TICK_CUSTOM 0Modify to
##define LV_TICK_CUSTOM 1Find line 174 and enable the LVGL log function
##define LV_USE_LOG 1Modify to
##define LV_USE_LOG 1Connecting LVGL and TFT_eSPI
follow directory
.
├── include
│   └── README
├── lib
│   └── README
│   └── lvgl
│   └── TFT_eSPI
├── platformio.ini
├── src
│   └── main.cpp
│   └── Port
│       └── lv_port_disp.cpp
│       └── lv_port_disp.h
└── test
    └── README
Create lv_port_disp.cpp and lv_port_disp.h
##ifndef LV*PORT_DISP_H*
##define LV*PORT_DISP_H*

##include "TFT_eSPI.h"
##include "lvgl.h"

##define DISP_HOR_RES 240
##define DISP_VER_RES 240
##define DISP_BUF_SIZE (DISP_HOR_RES\*DISP_VER_RES/4)

extern TaskHandle_t handleTaskLvgl;
void Port_Init();
void lv_port_disp_init(TFT_eSPI\* scr);

##endif
##include "lv_port_disp.h"
// 用于初始化完毕后启用LVGL显示的TaskHandle_t
TaskHandle_t handleTaskLvgl;
// lvgl显示驱动
static lv_disp_drv_t disp_drv;
// lvgl更新任务
void TaskLvglUpdate(void\* parameter) {
// 阻塞在此处,直到xTaskNotifyGive
ulTaskNotifyTake(pdTRUE, portMAX_DELAY);
for (;;) {
lv_task_handler();
delay(5);
}
}
/\*\*
- @brief 显示初始化
- @param 无
- @retval 无
\*/
void Port_Init() {
static TFT_eSPI screen;
/_ 屏幕初始化 _/
screen.begin();
screen.initDMA(true);
screen.setRotation(0);
screen.fillScreen(TFT_BLACK);
/_ lvgl初始化 _/
lv_init();
lv_port_disp_init(&screen);
printf("lvInitDone\n");
// 在核心2上执行LVGL
xTaskCreatePinnedToCore(TaskLvglUpdate, "LvglThread", 20480, nullptr,
configMAX_PRIORITIES, &handleTaskLvgl, 1);
}
/\*\*
- @brief 自定义打印函数
- @param 无
- @retval 无
*/
void my_print(lv_log_level_t level, const char *file, uint32_t line,
const char *fun, const char *dsc) {
Serial.printf("%s@%d %s->%s\r\n", file, line, fun, dsc);
Serial.flush();
}
/\*\*
- @brief 屏幕刷新回调函数
- @param disp:屏幕驱动地址
- @param area:刷新区域
- @param color_p:刷新缓冲区地址
- @retval 无
*/
static void disp_flush_cb(lv_disp_drv_t *disp, const lv*area_t *area,
lv_color_t _color_p) {
TFT_eSPI \_screen = (TFT_eSPI _)disp->user_data;
int32_t w = (area->x2 - area->x1 + 1);
int32_t h = (area->y2 - area->y1 + 1);
screen->startWrite();
screen->setAddrWindow(area->x1, area->y1, w, h);
screen->pushPixelsDMA((uint16*t *)(&color*p->full), w * h);
screen->endWrite();
lv_disp_flush_ready(disp);
}
/\*\*
- @brief 屏幕初始化
- @param 无
- @retval 无
_/
void lv_port_disp_init(TFT_eSPI_ scr) {
lv*log_register_print_cb(reinterpret_cast<lv_log_print_g_cb_t>(
my_print)); /* register print function for debugging _/
DMA_ATTR static lv_color_t \_lv_disp_buf =
static_cast<lv_color_t _>(heap_caps_malloc(
DISP_BUF_SIZE \* sizeof(lv_color_t), MALLOC_CAP_DMA));
static lv_disp_draw_buf_t disp_buf;
lv_disp_draw_buf_init(&disp_buf, lv_disp_buf, nullptr,
DISP_BUF_SIZE);
/_Initialize the display_/
lv_disp_drv_init(&disp_drv);
disp_drv.hor_res = DISP_HOR_RES;
disp_drv.ver_res = DISP_VER_RES;
disp_drv.flush_cb = disp_flush_cb;
disp_drv.draw_buf = &disp_buf;
disp_drv.user_data = scr;
lv_disp_drv_register(&disp_drv);
}Write a simple example to test whether LVGL can run
##include <Arduino.h>
##include "./Port/lv_port_disp.h"

void setup() {
Serial.begin(115200); // Set to a high rate for fast image transfer to a PC
Port_Init();

lv_obj_t \*label = lv_label_create(lv_scr_act());
lv_label_set_text(label, "Toou.\nAnata wa watashi no masuta ka?");

// 一切就绪, 启动LVGL任务
xTaskNotifyGive(handleTaskLvgl);
}

void loop() {

}
Toou.Anata wa watashi no masuta ka?
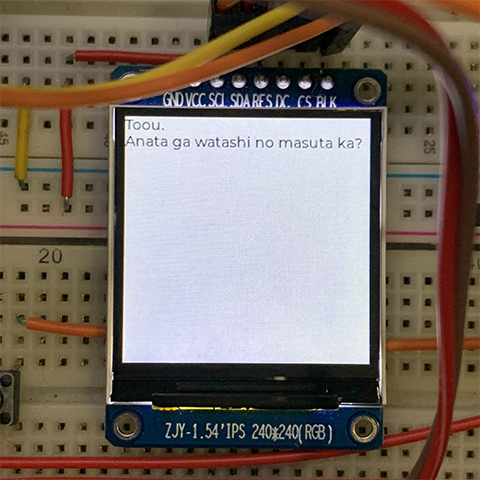
Under construction, to be updated
FAQ
Q: When the screen is turned on, the compiler reports that TFT_eSPI cannot be found.
A: Check whether TFT_eSPI is integrated Place TFT_eSPI inside the lib folder and add to the end of the platformio.ini file
lib_extra_dirs = lib/TFT_eSPIQ: When transplanting LVGL, the screen color is abnormal.
A: It may be related to #define LV_COLOR_16_SWAP 0 in the lv_conf.h file You can try changing 0 here to 1, or changing 1 back to 0
Environment:
Espressif 32 (3.4.0) > ESP32 Pico Kit
framework-arduinoespressif32 3.10006.210326 (1.0.6)
tool-esptoolpy 1.30100.210531 (3.1.0)
toolchain-xtensa32 2.50200.97 (5.2.0)
<lvgl> 8.1.1-dev
<TFT_eSPI> 2.3.89
esptool.py v3.1