0x00 sequence
In Previous article, we simulated the visual effects of various dithering algorithms in the browser through JavaScript. Although the principle is clear, the real challenge lies on the hardware side: How to reproduce these effects on resource-constrained embedded devices?
This article will record my actual combat process based on ESP32-S3 and a 1.54-inch ST7305 monochrome screen, and explore how to implement various image processing algorithms from basic threshold methods to complex error diffusion on a single-chip microcomputer.
0x01 Hardware environment
- MCU: ESP32-S3 (Of course, ordinary ESP32 or even ESP8266 is also fully capable)
- Screen: 1.54 inch Monochrome Display Osprey Optoelectronic Monochrome Screen
- Driver: ST7305 (This kind of controller is also common in some small-size e-paper displays with black and white or three-color black and white)
- Resolution: 200 x 200 (1-bit Monza, pure black and white)
We chose ESP32-S3 mainly because of its built-in large-capacity SRAM (512KB+) and support for PSRAM, which allows us to handle image buffers of 200x200 (only 5KB) or even higher resolutions with ease. The ST7305 is a driver chip mainly used for dot matrix electronic paper displays and communicates through the SPI interface.
0x02 Core Challenge
On the PC web side, we have Float32Array and nearly unlimited memory. But on ESP32-S3, we need to pay attention to:
- Memory management: Try to reuse Buffer to avoid frequent
malloc/freememory fragmentation. - Gamma Correction: The Gamma Table must be implemented manually in C, otherwise the picture will be severely dark.
- Driver Adaptation: Screens usually require a more complex SPI initialization sequence, especially for different screen glass panels, which require the correct voltage and screen drive waveform to be configured.
0x03 code implementation details
The project structure is as follows:
main/
├── blue_noise.h      // 预计算的蓝噪声纹理数组
├── esp_lcd_st7305.c  // 屏幕驱动实现
├── hello_world_main.c// 核心逻辑与算法实现
└── sample_img.h      // 测试用灰度图片数组
Build a Gamma lookup table (LUT)
As mentioned in the first article, this is the most critical step. If Gamma correction is not performed, when the linear space dithering algorithm processes sRGB images, the midtones will be darker. Since the powf function is very expensive to compute on the embed, we definitely cannot compute it in real time for every pixel. For performance, we precompute a 256-length lookup table at startup.
// Gamma correction LUT (0-255 -> 0.0-1.0 linear)
static float s_gamma_lut[256];

void init_gamma_lut() {
  for (int i = 0; i < 256; i++) {
    // sRGB to Linear: ((val / 255.0) ^ 2.2)
    s_gamma_lut[i] = powf(i / 255.0f, 2.2f);
  }
}
Any subsequent reading of the pixel passes through s_gamma_lut[pixel] to obtain its linear brightness value. This is a classic space-for-time strategy.
Basic algorithm: Threshold & Random
The simplest algorithms are often good baselines.
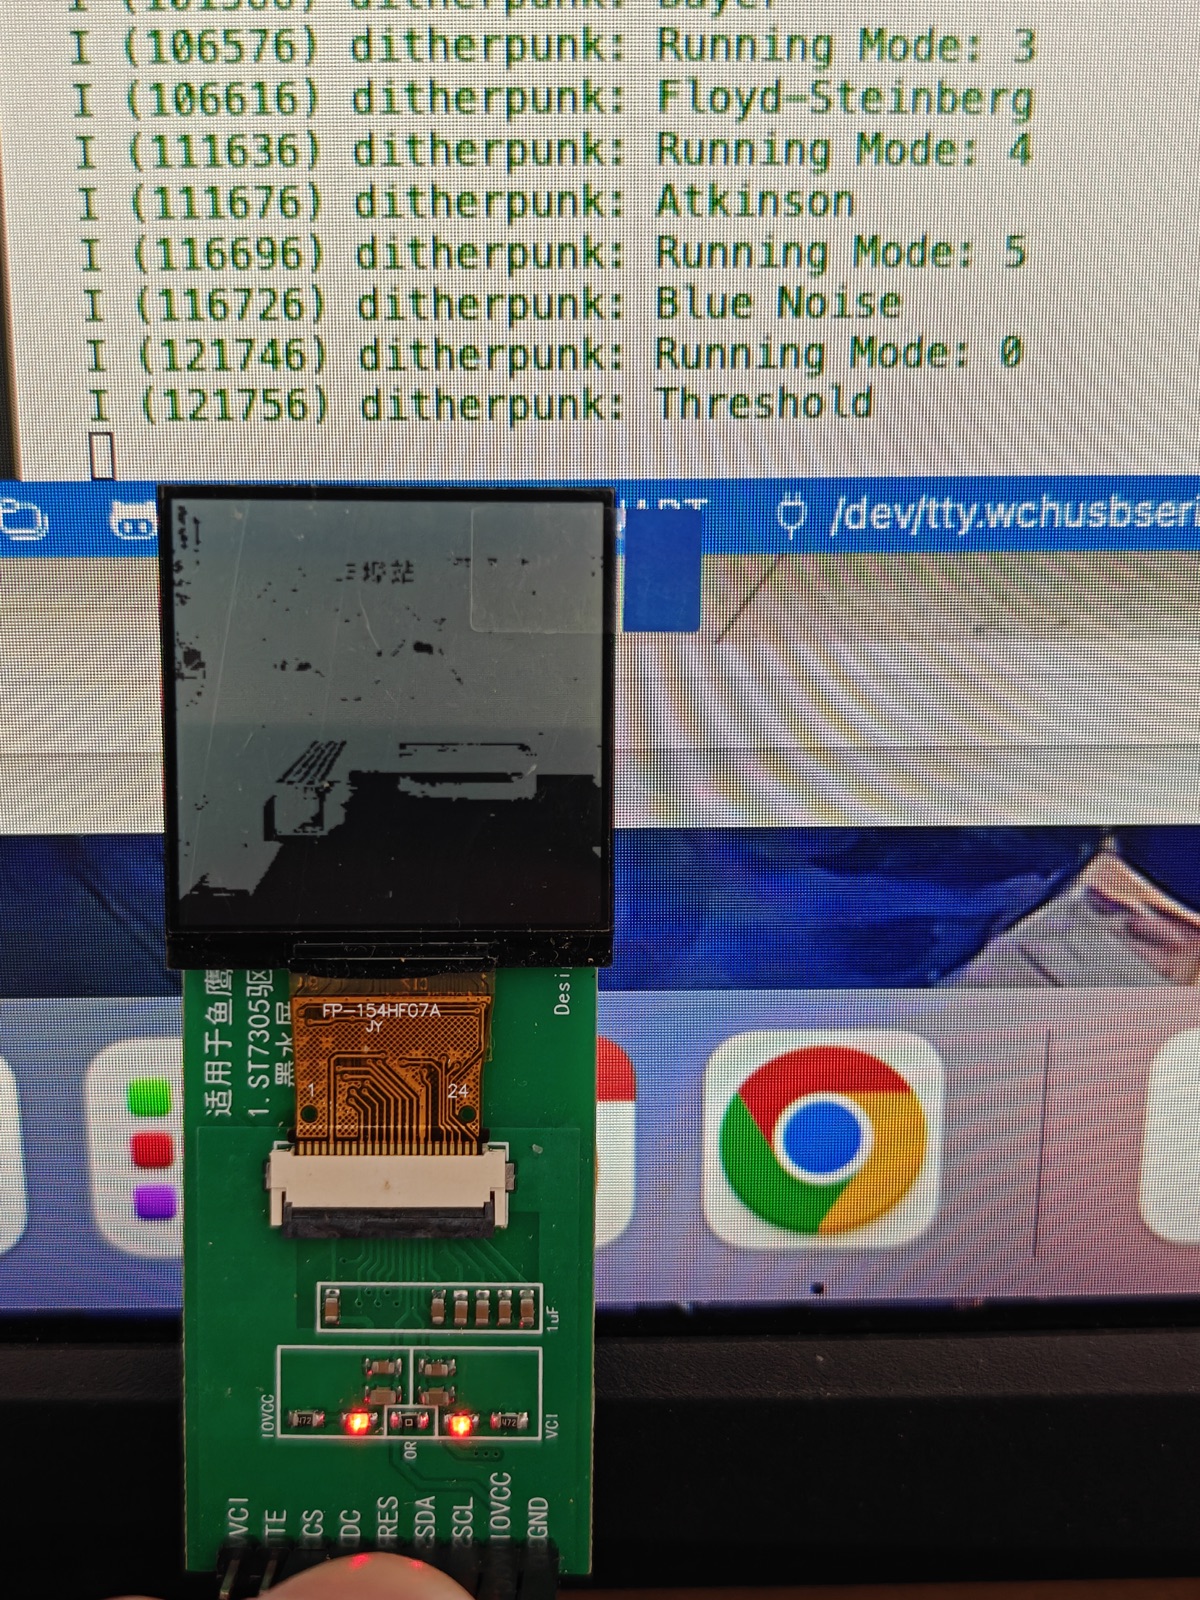
Threshold (threshold method): That is binarization. This is the fastest method, but also the least effective.
void dither_threshold(const uint8_t *src, uint8_t *dst) {
  memset(dst, 0, ST7305_FRAMEBUFFER_SIZE);
  for (int i = 0; i < ST7305_WIDTH * ST7305_HEIGHT; i++) {
    float val = s_gamma_lut[src[i]];
    bool white = val > 0.5f;
    set_pixel_1bit(dst, i % ST7305_WIDTH, i / ST7305_WIDTH, white);
  }
}
Real shot effect: A lot of details are lost, commonly known as “two-color picture”. It preserves only the hardest edges and almost completely loses all grayscale information.
Random (random dithering)
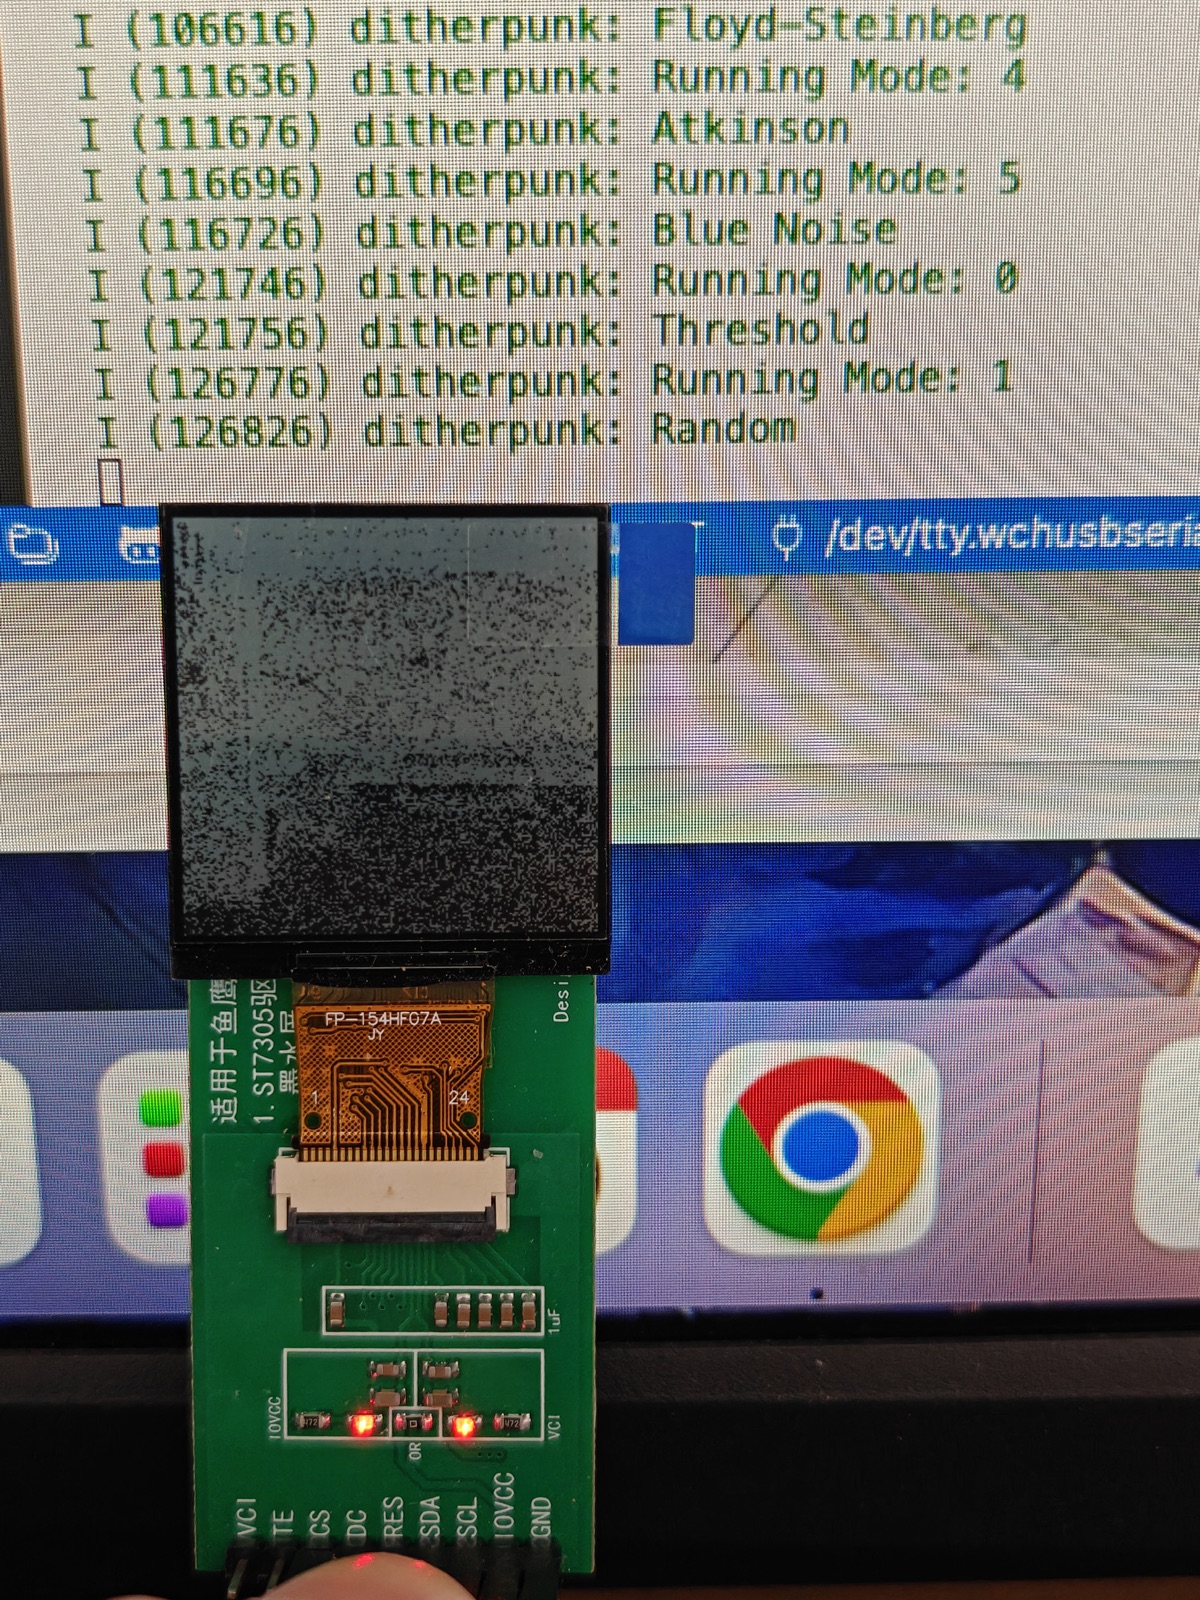
To retrieve the lost grayscale, we introduce rand() to break the quantization ladder. By adding a random noise to each pixel value, pixels originally near the threshold have a half probability of flipping, thus showing grayscale macroscopically.
    float noise = ((float)rand() / RAND_MAX) - 0.5f; // -0.5 to 0.5
    bool white = (val + noise) > 0.5f;
Real shot effect: Although it has a grayscale feel, the picture is very dirty and full of white noise. This kind of high-frequency noise looks like “snowflakes” to the human eye, which is not pleasant.
Ordered dithering: Bayer Matrix
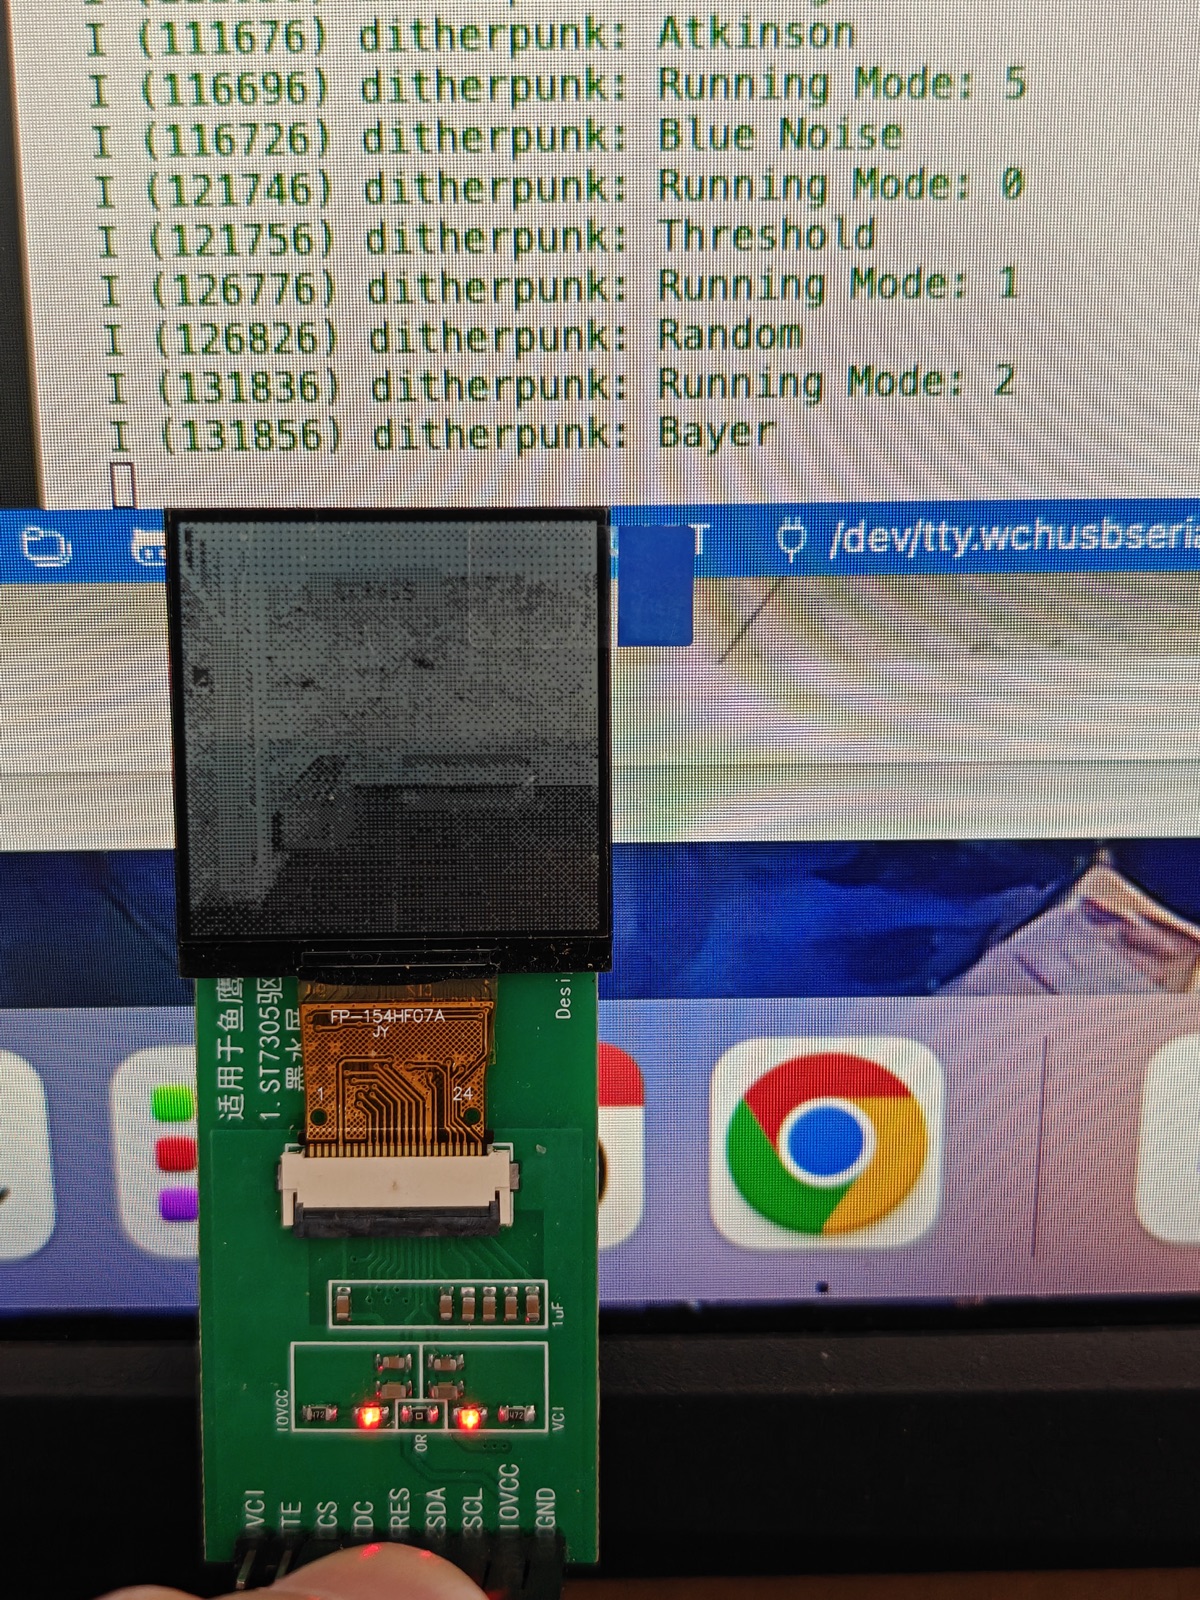
Ordered dithering is very suitable for ultra-low-end microcontrollers without Framebuffer (such as Arduino Uno, ATtiny85), because it is Point-Operation (point operation) and does not need to know the information of neighboring pixels, nor does it need to store the error of the previous row. We can calculate it independently for each pixel.
static const float s_bayer_matrix[4][4] = {
    {0.0f / 16.0f, 8.0f / 16.0f, 2.0f / 16.0f, 10.0f / 16.0f},
    {12.0f / 16.0f, 4.0f / 16.0f, 14.0f / 16.0f, 6.0f / 16.0f},
    // ... complete matrix
};

// Inside loop
float threshold = s_bayer_matrix[y % 4][x % 4];
bool white = (val > threshold);
Real shot effect: classic cross mesh pattern. This style is very common in retro GameBoy games and early Macintosh systems. It simulates grayscale through regular textures, which although looks a bit “artificial”, is much cleaner than random dithering.
Error Diffusion: Floyd-Steinberg & Atkinson
For devices that support Framebuffer (ESP32 with enough RAM), error diffusion is the best option. You need a floating point Buffer to store the error during the diffusion process.
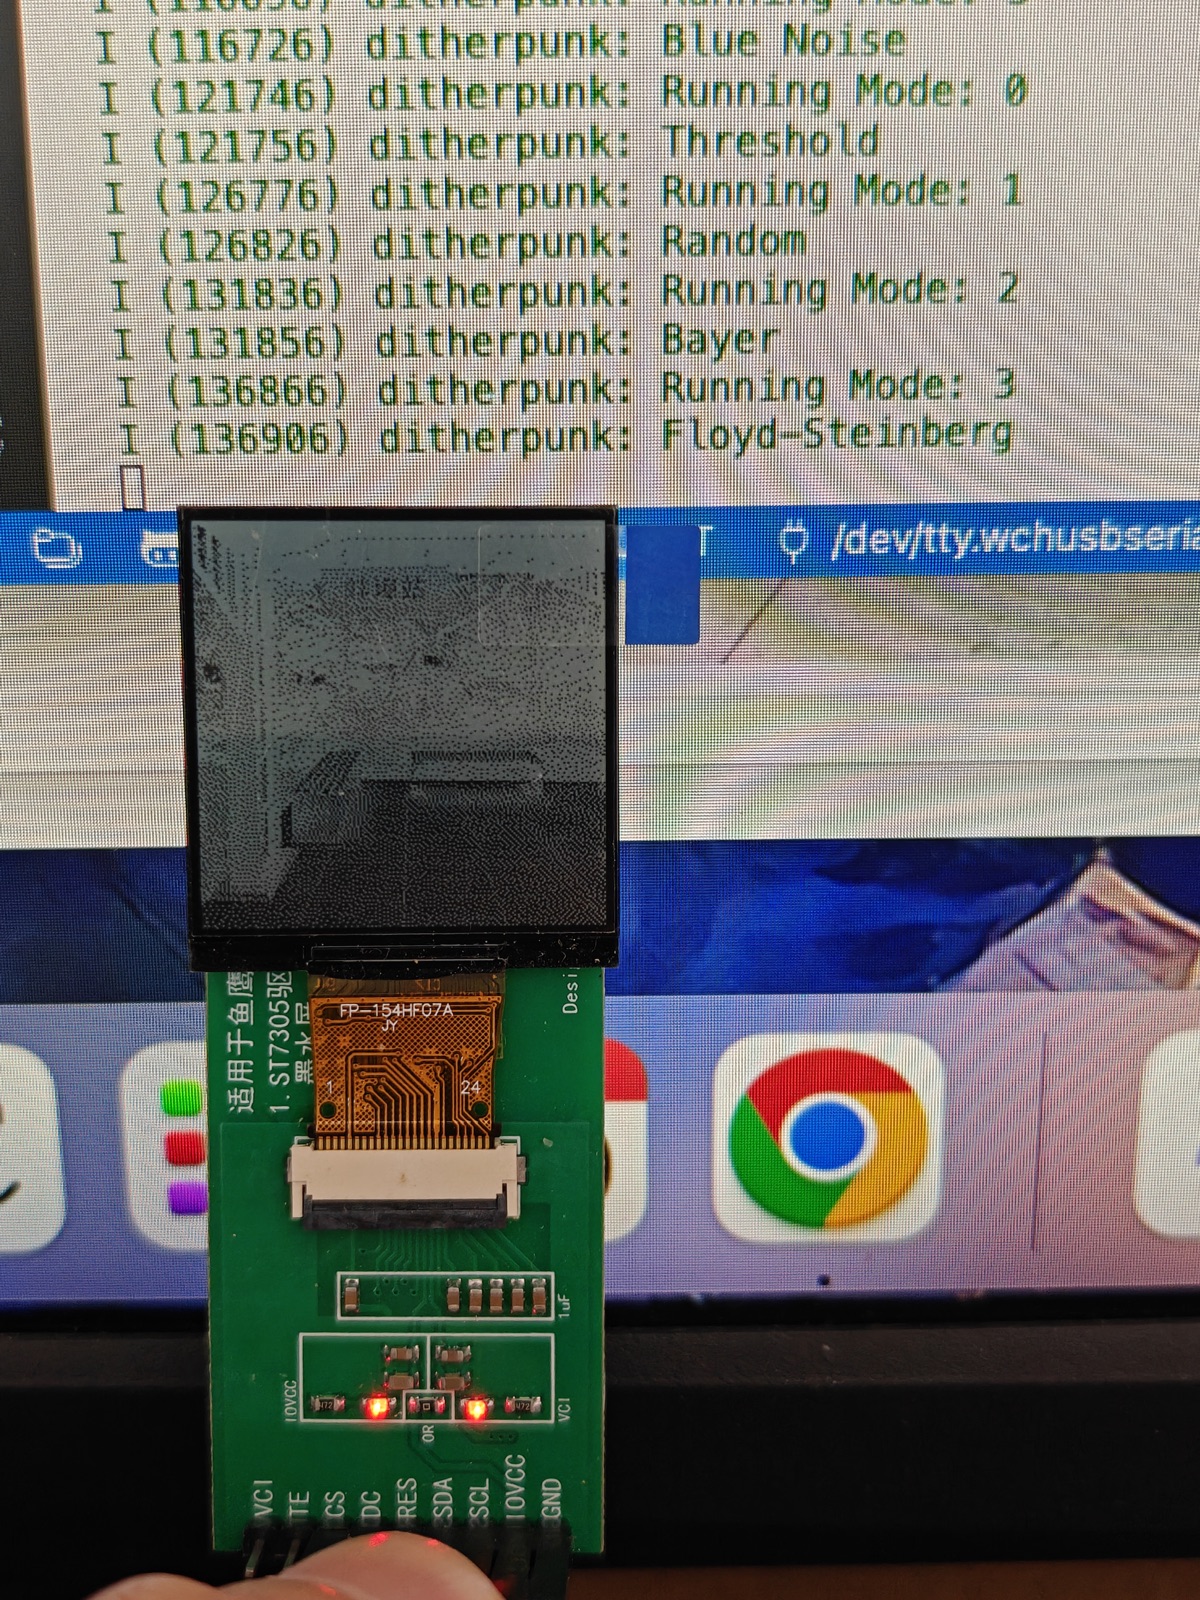
Floyd-Steinberg is a textbook standard with a diffusion coefficient of 7, 3, 5, 1 (/16). It attempts to perfectly assign every error produced by quantization to its neighbors, being mathematically the most accurate.
Real shot effect:
Atkinson is more suitable for this kind of high-resolution but low color depth screen. Designed by Bill Atkinson, it does not retain 100% of the error like Floyd-Steinberg, but only retains 75% of the error for diffusion, which artificially creates some “dead black” and “dead white” areas. This may sound like a drawback, but on a low-contrast monochrome screen, it actually increases local contrast, making images look clearer and sharper, and reducing “worm” artifacts.
      // Distribute 1/8 to neighbors (Atkinson)
      float err_part = quant_error / 8.0f;

      if (x + 1 < ST7305_WIDTH)
        work_buf[y * ST7305_WIDTH + x + 1] += err_part;
      if (x + 2 < ST7305_WIDTH)
        work_buf[y * ST7305_WIDTH + x + 2] += err_part;
      // ... bottom neighbors
Real shot effect: This is my favorite algorithm on this screen. The lines are tough and the texture is excellent, especially suitable for UI interfaces that display a mixture of text and icons.
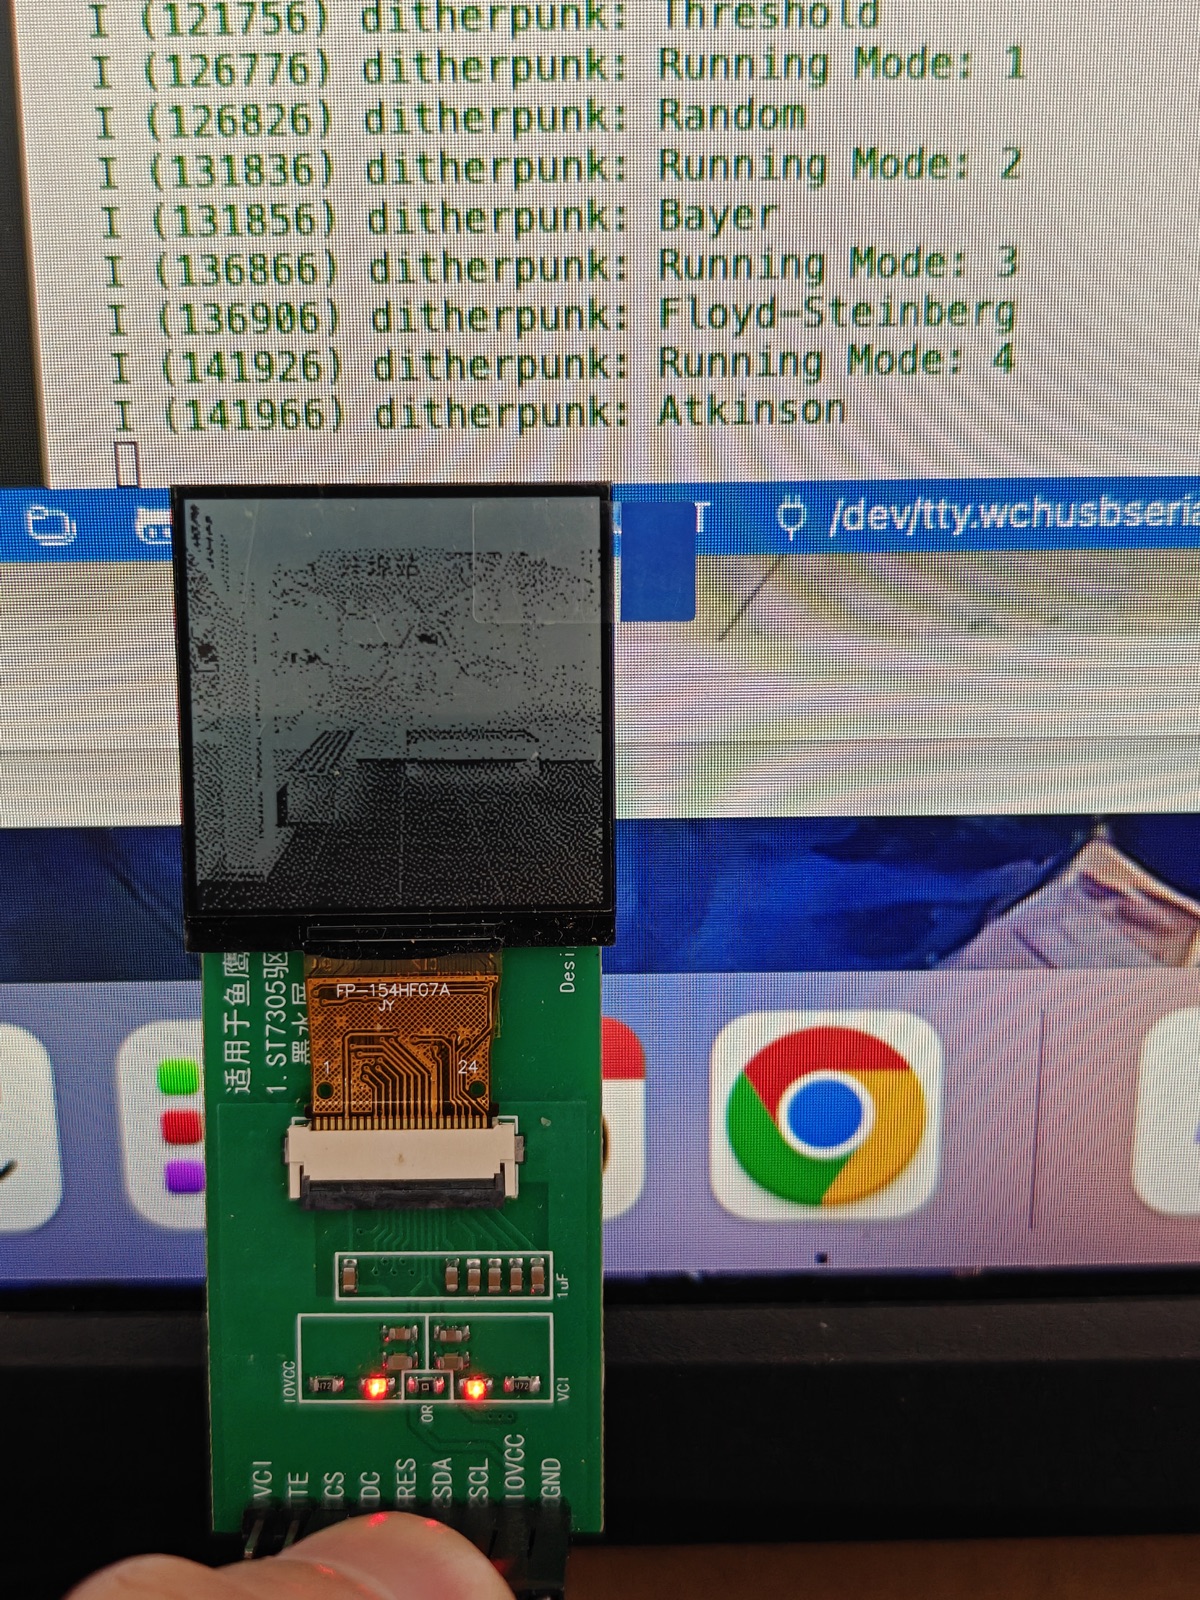
Unique flavor: Blue Noise (Blue Noise)
If you want to simulate a film look on an embedded device, blue noise is the only option. Its computational cost is as low as Bayer (it only requires table lookup), but its effect can deceive the human eye through “disordered but evenly distributed” noise.
We need to convert a precomputed blue noise textures into a C array (blue_noise.h) and store it in Flash. This means you need to sacrifice dozens of KB of Flash space in exchange for this effect.
      // Map 0-255 texture to 0.0-1.0
      float threshold = blue_noise_map[(y % BN_H) * BN_W + (x % BN_W)] / 255.0f;
      bool white = (val > threshold);
Real shot effect: Very natural graininess without any regular stripes, just like an old photo. This algorithm is particularly suitable for displaying portrait and landscape photography.
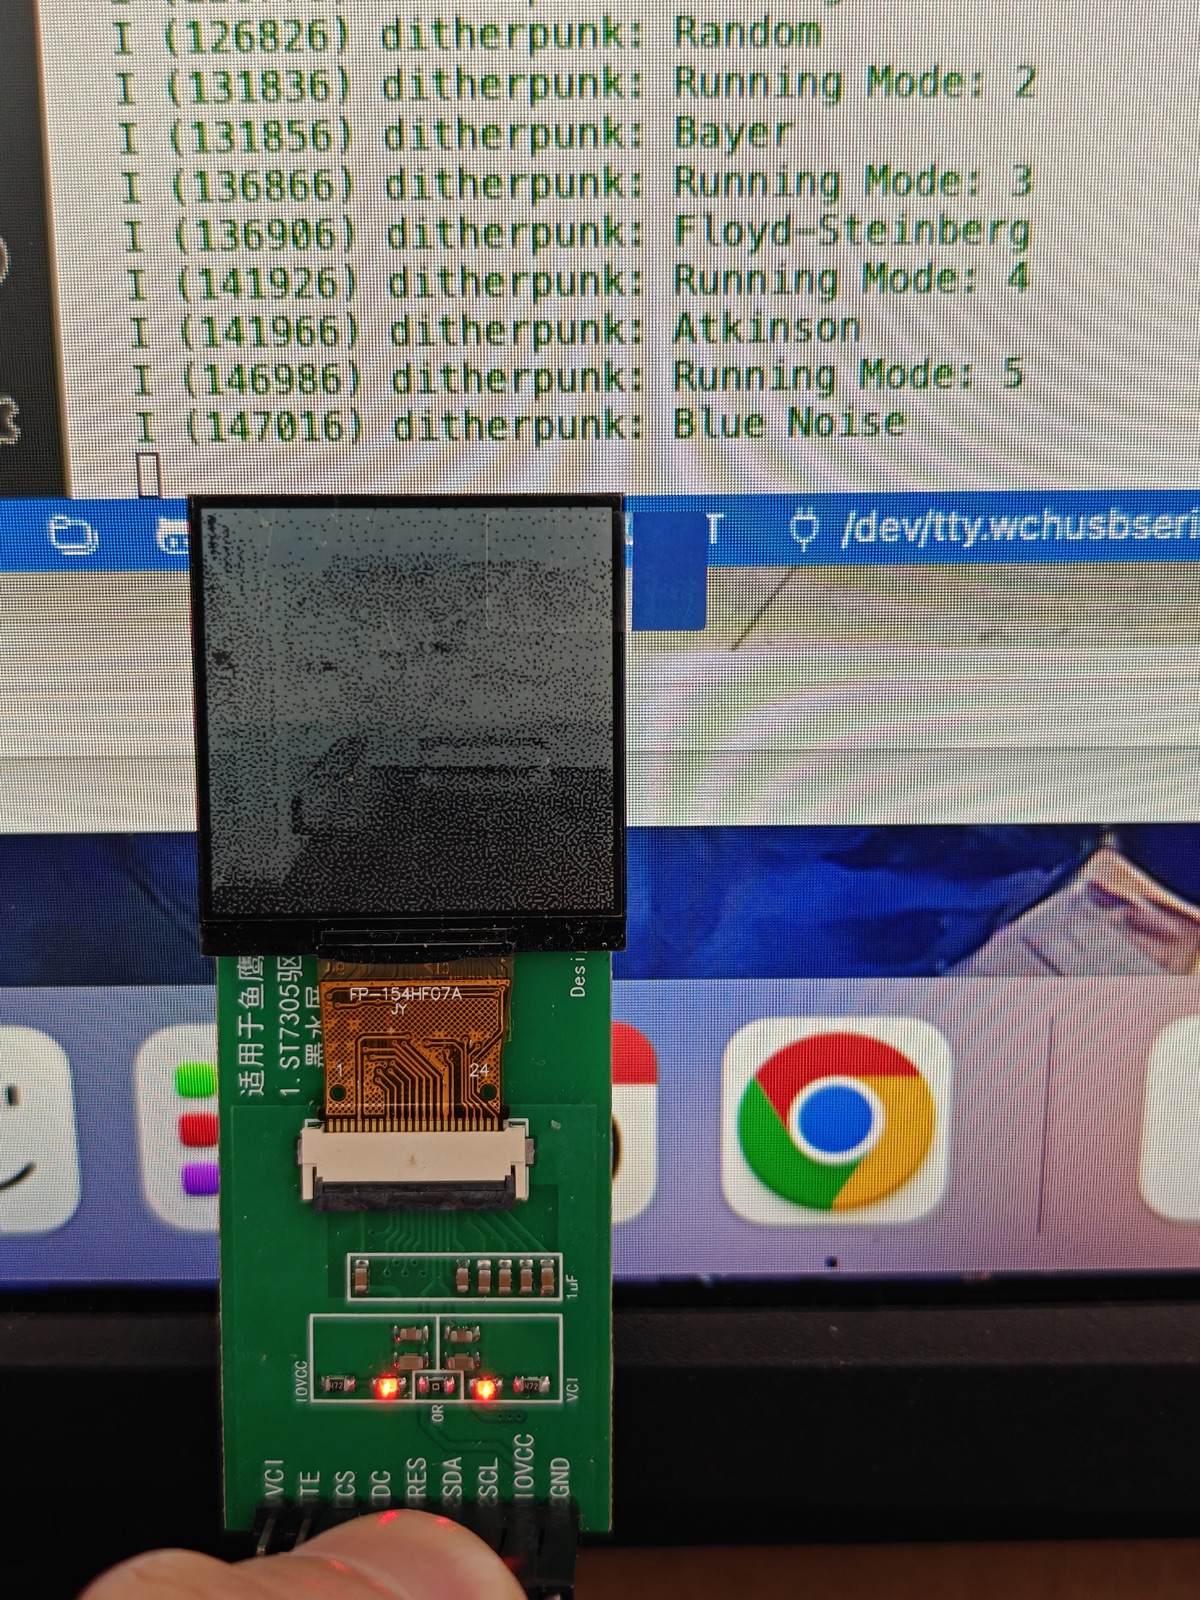
0x04 Summary
On an MCU of the ESP32 level, we can achieve high-quality instant image dithering. Different algorithms are suitable for different scenarios:
- Bayer ordered dithering: Minimal computational overhead, suitable for extremely resource-constrained (such as low-end microcontrollers without RAM) or retro-style games.
- Atkinson: The highest contrast, clear edges, suitable for UI interfaces and mixed text scenes.
- Blue Noise: Grainy and natural, suitable for displaying photographic images, but requires additional Flash space to store textures.
I hope this article can provide you with some ideas in monochrome screen development.
0x05 References
- Kevincoooool/esp_lcd_st7305 - This article ST7305 driver transplant reference
- DuRuofu/esp-idf-st7305-Ink-screen - Another excellent ST7305 driver implementation