Disclaimer This project is only a non-commercial fan creation (Fan-made Project) conducted by the author out of technical exploration and personal interest. All design resources (PCB/code) are only for electronic technology communication and learning reference. is strictly prohibited from being used for any commercial purposes or mass production and sales.
About copyright: The copyright of “Counter-Strike 2” (CS2) and related materials mentioned in this article belongs to Valve Corporation. This site has no connection with Valve and has not been officially authorized. This project is a synchronized technical verification of the game mechanism at the hardware level.
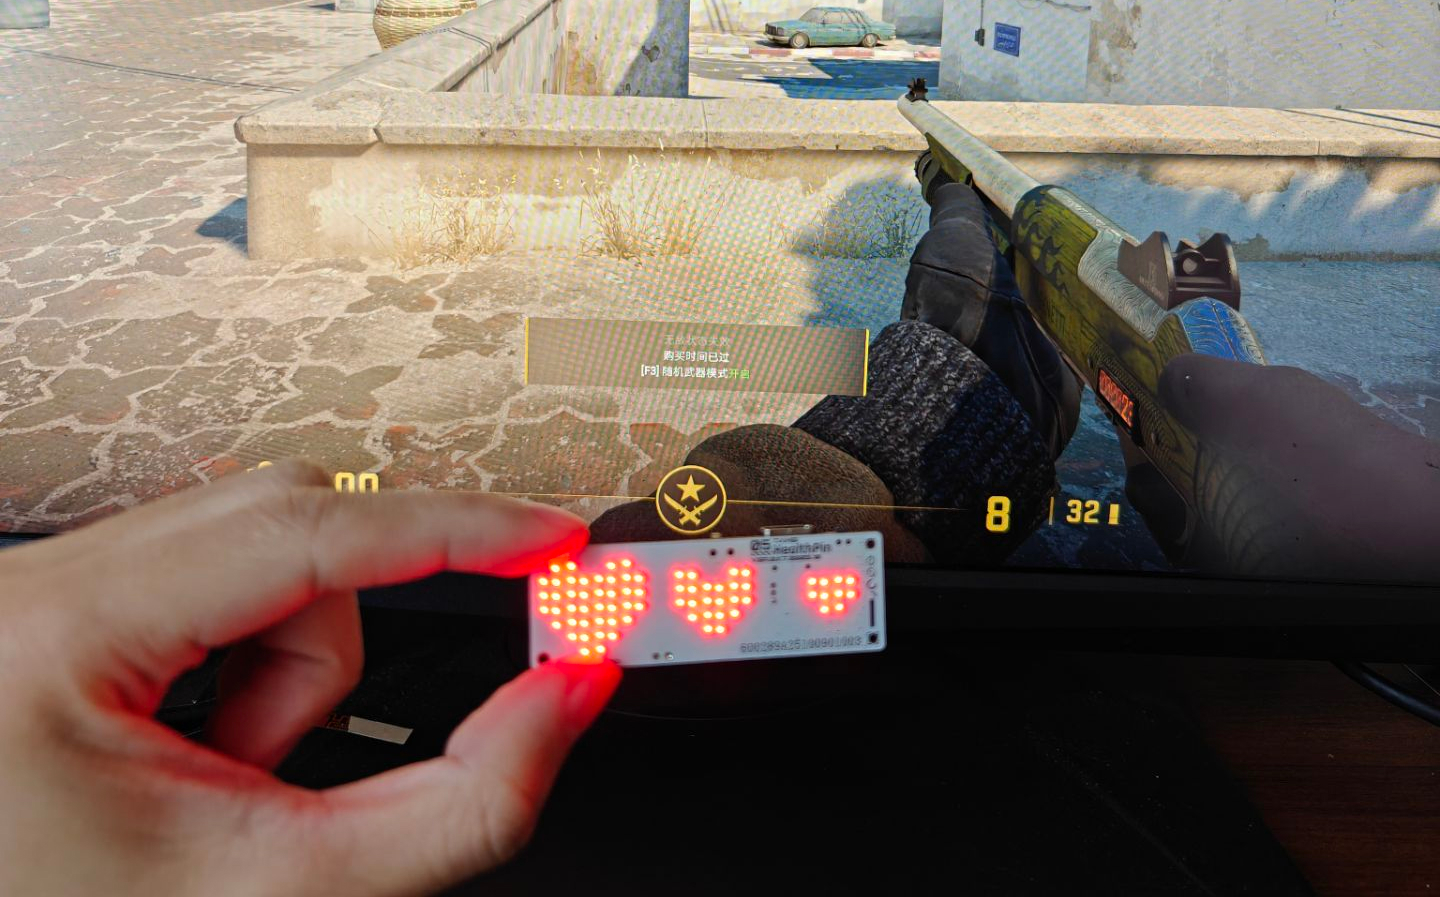
background
In CS2 (also available in CS:GO), there is an accessory called a health badge.
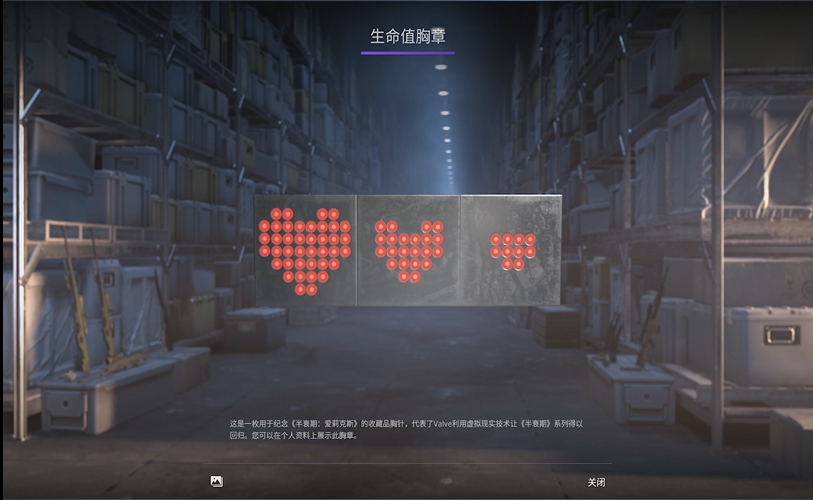 When I saw it for the first time, I thought it would be very suitable to use LED.
And you can also synchronize the health status in the game through CSGO GSI.
When I saw it for the first time, I thought it would be very suitable to use LED.
And you can also synchronize the health status in the game through CSGO GSI.
Additional information
Many people pointed out that the badge came from Half-Life: Alyx. I had only played the beginning at a friend’s house before, so I wasn’t very impressed with this device in Half-Life. After watching some live videos of Alyx, I learned more specific information about this device. Maybe in the future, we can make three complete versions of hearts, and then like the ones in Alyx, each heart will change in size, which greatly improves the expressiveness.
Component selection
MCU selection
Since the size of the badge is small (60mmx20mm), and I don’t want the finished product to be too thick to wear, and I don’t want to drag a wire around, so the main control must be a chip that supports wireless (Espressif: Someone called me?). Although I like Espressif’s chips very much (I have written many tutorials about ESP32 streaming and ESP32 displays public network pictures before), I’m sorry, I’m really sorry this time, your power consumption is really too high.
When I was making Friday Ink before, the chip I used was CH582F, which made me slightly fond of WCH Wang Cuihua’s chip. It is not only cheap and useful, but also has low power consumption.
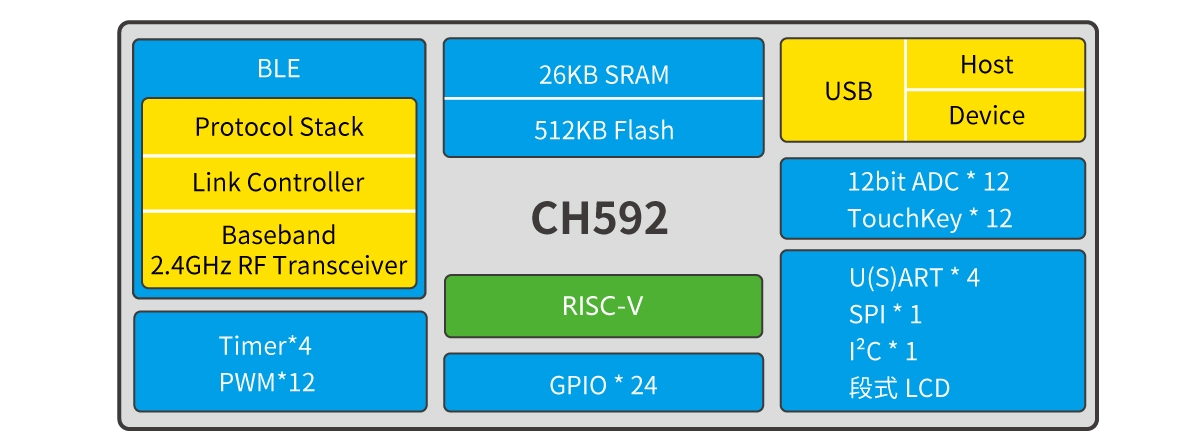
After evaluating the cost and development volume, WCH Wang Cuihua’s CH592F was finally selected as the main control. Compared with the previous CH582F, the RAM is slightly reduced, but it is absolutely sufficient for the current HealthPin.
LDO selection
The LDO I loved to use before was AP2112K-3.3TRG, which originated from the habit I formed when I copied the Arduino Pro micro many years ago.
In order to further reduce costs, the LDO was replaced with ME6211, which is easier to purchase and only costs 0.18 yuan.
Lithium battery charging chip selection
In the previous compass design, the lithium battery charge management chip used was MCP73831. When I first purchased this IC, it cost 4 yuan, but later the price actually increased to 8 yuan (although it has fallen back recently, but it still makes me wary). Therefore, the charging management chip was replaced by TP4057, which only costs 0.45 yuan. There is not much difference in the peripheral components between the two. You only need to pay attention to the pin definitions.
LEDs and MOS selection
As you know, RGB can improve performance by 300%, so LEDs did not hesitate to choose 1mm x 1mm RGBLEDs with built-in WS2812B.
Considering that the static power consumption of WS2812B is a bit high, which is even worse for our already small battery, the three hearts are divided into three groups. Except for the smallest heart, which cannot actively turn off the power supply, the other two hearts will use MOS tubes to control the power switch to achieve the purpose of completely shutting down when not in use to save power.
For passive loads such as light bulbs and motors, simple-driven NMOS is usually used as a down-switch to control the ground loop. For active devices such as the WS2812B that require precise digital communication with the MCU, in order to ensure the integrity of the communication signal and the stable common ground between the two, it is preferred to use PMOS as the upper tube to control its power supply instead of controlling its ground wire.
To save space, choose a SOT23-6 package BRCS4953 to provide dual PMOS.
Regarding the driving principle of WS2812, I finally adopted the SPI+DMA zero CPU usage solution. For detailed implementation principles and code analysis, please refer to the in-depth analysis article of this project: “CH592F uses SPI+DMA to drive WS2812LEDs”.
PCB design
I have tried putting the LEDs and main control on two boards respectively and then soldering them together, but this will increase the thickness of the board and the cost will also increase.
This plan was abandoned and implemented using traditional double-sided components.
The final rendering of PCBA is as follows:
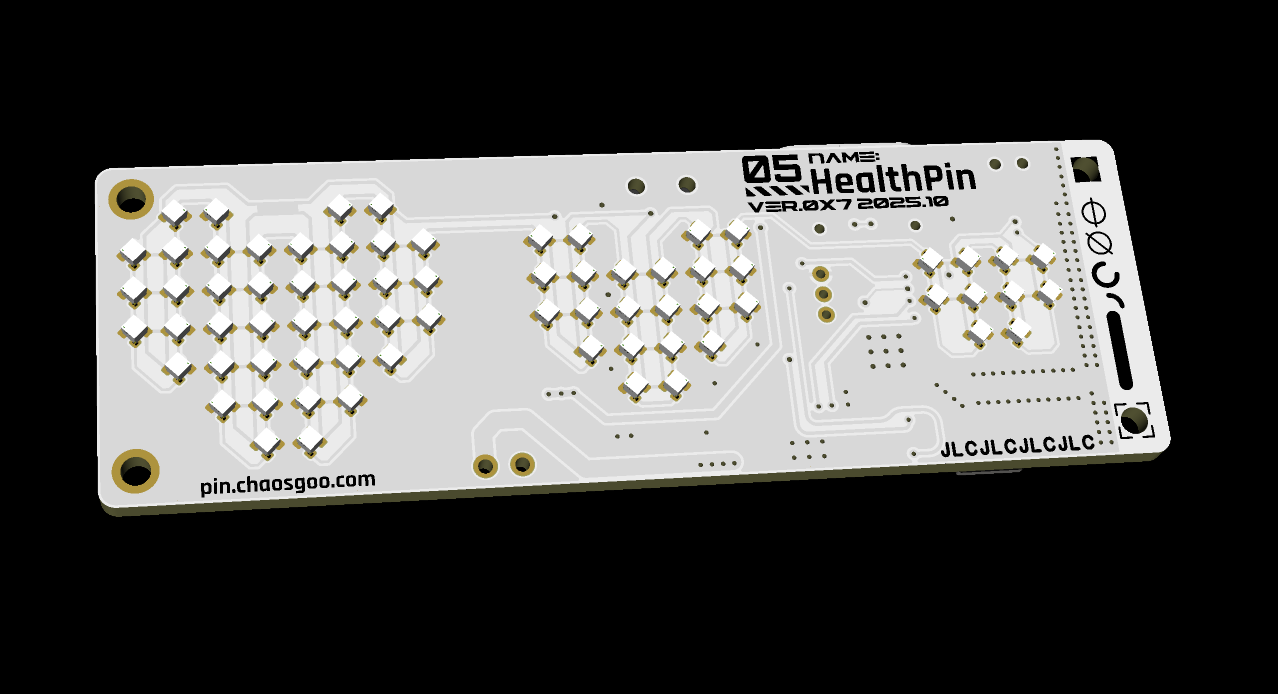 There is an easter egg with the word
 BOMB HAS BEEN PLANTED HANDLE WITH CARE printed on the periphery of the battery.
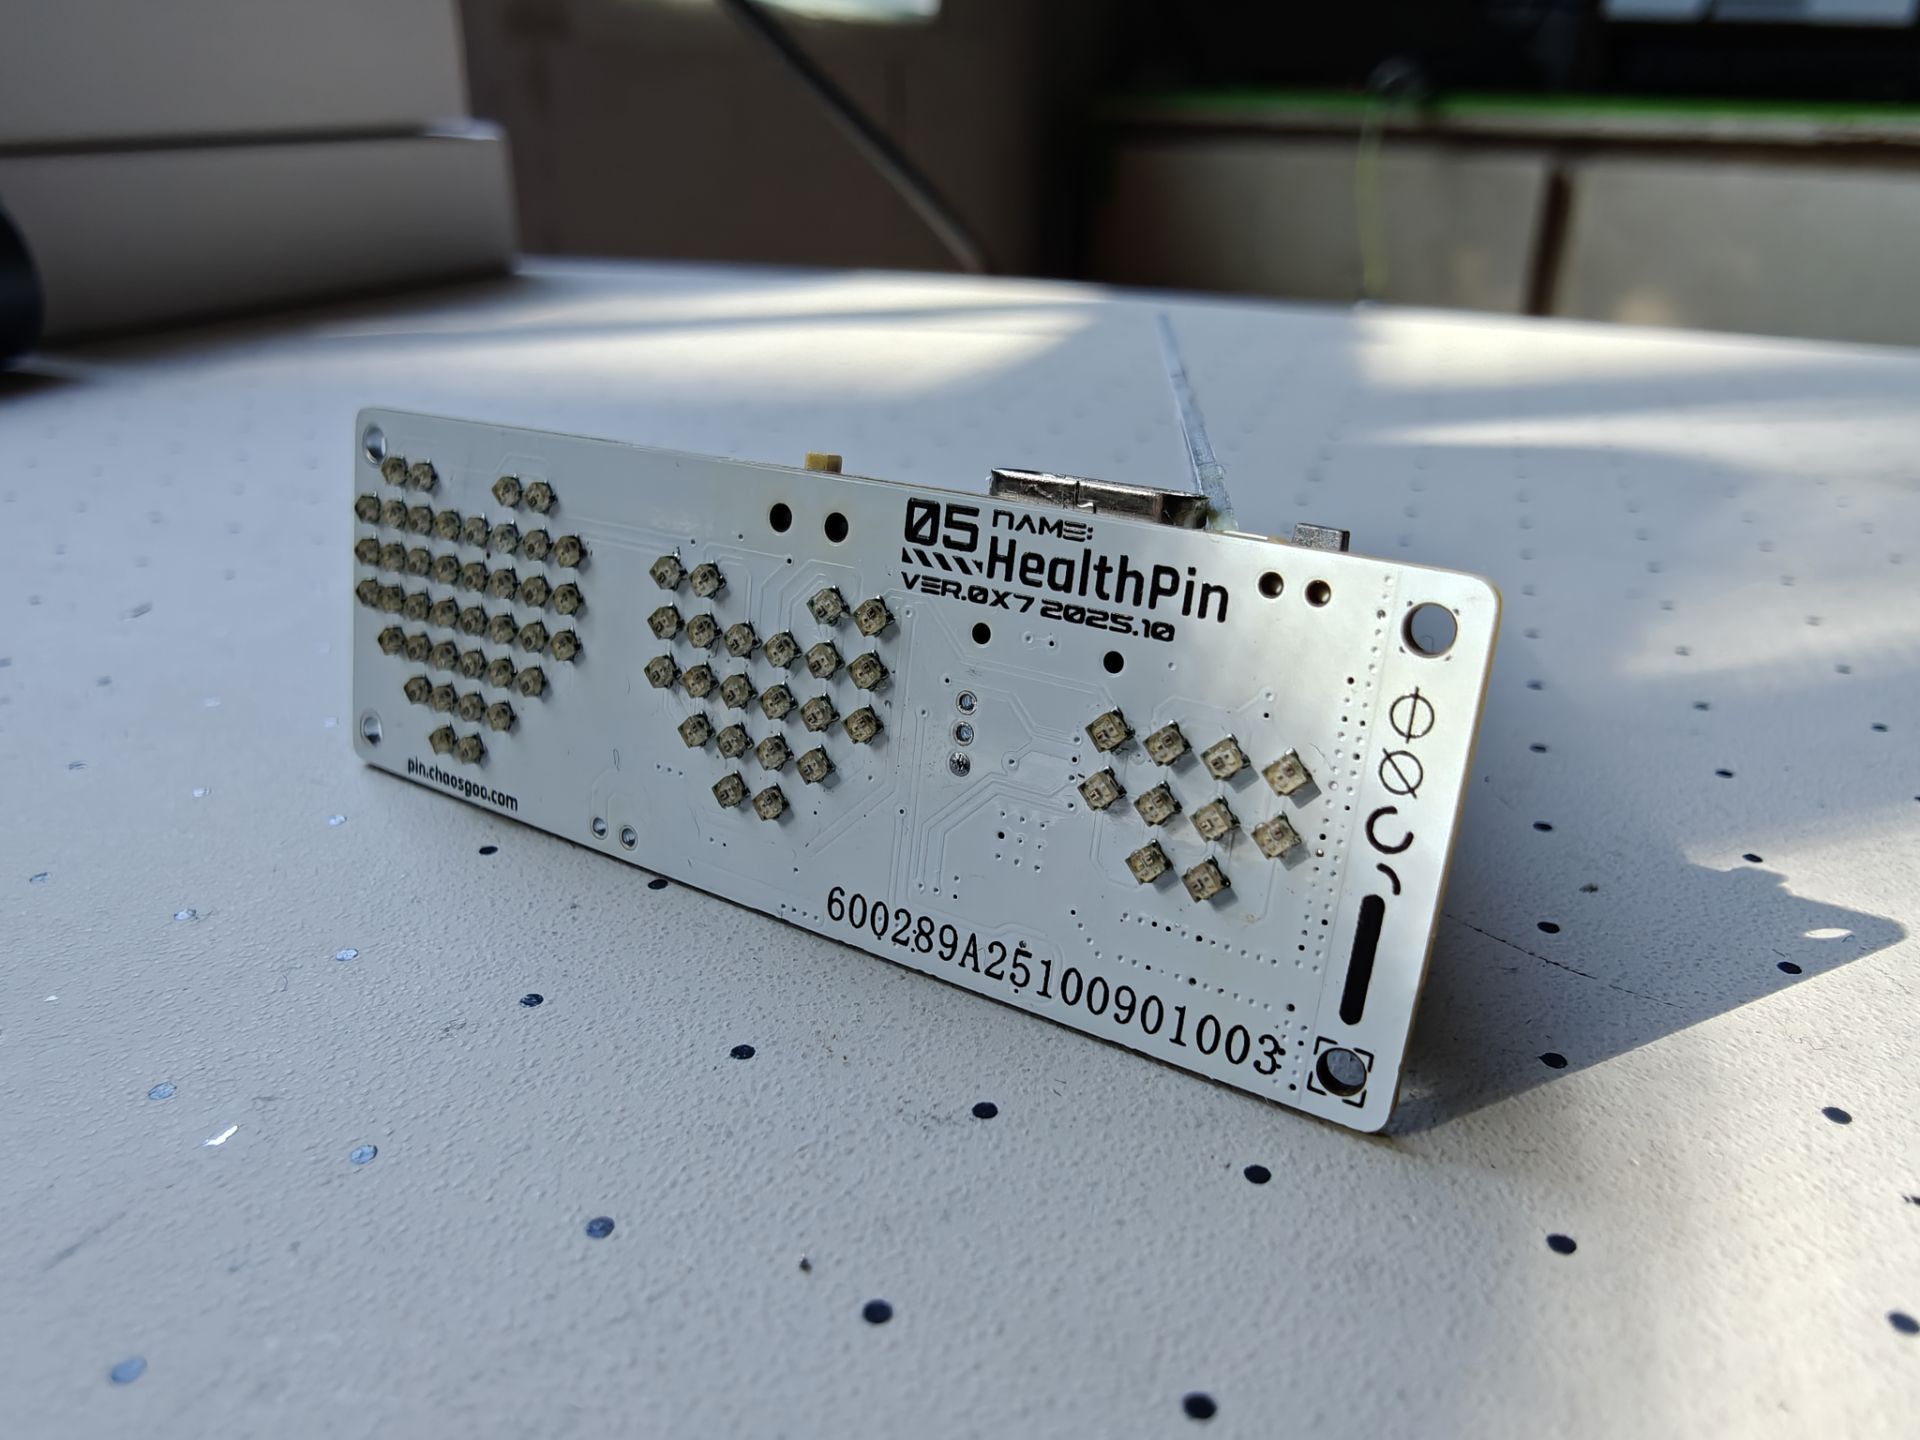
Physical soldering effect display
Since there is no shell and the solder mask is white, it looks different from the original design of the game.
program
StatTrak Project Review
Before CS:GO was upgraded to CS2, I actually made a StatTrak that could be linked with the game.
The plan at that time was to directly write a python script to communicate with the CS:GO GSI, and then use pyserial to send kill data to the device.
Auraro
I remember that Logitech’s GHUB can control the linkage between its own devices and games, so I was wondering if there is a similar open source solution to achieve similar unified management.
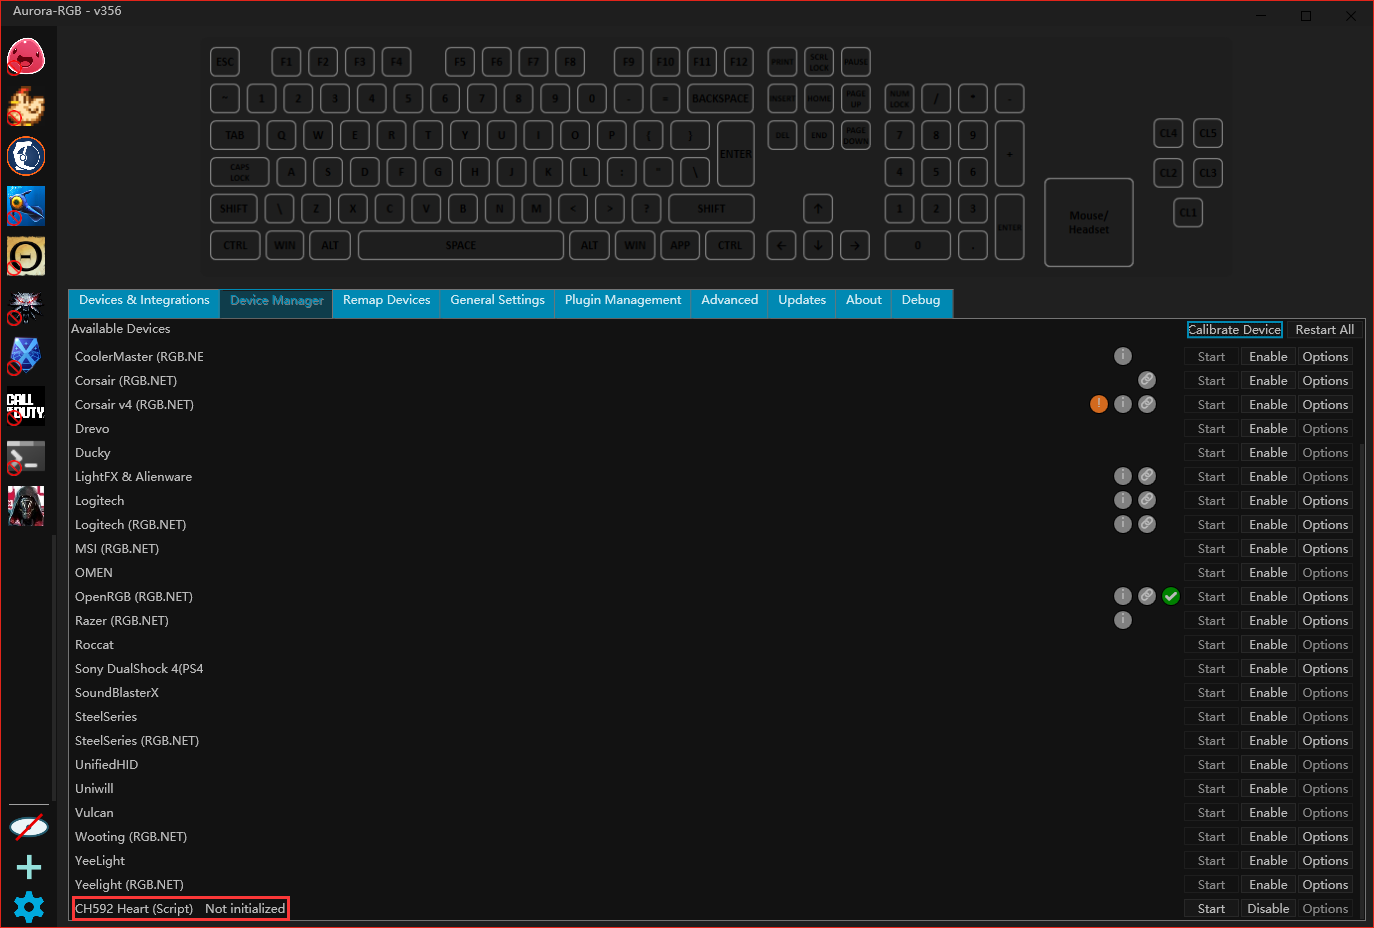
After searching, Fangfang learned about the open source project Project Aurora.
The most exciting thing is that Aurora is not only compatible with equipment from many well-known manufacturers, it even has a set of Device Script for third-party devices to achieve docking.
Device Script writing
There is a example_script.csunder Aurora’s repository that provides a simple example. HealthPin’s communication method uses Bluetooth HID, and the Bluetooth HID device will be regarded as an ordinary HID device after connecting to the computer, and only needs to use the standard HID communication API to send data to the device.
Agreement formulation and implementation
Our device has an LED and a buzzer, so the protocol exposes these capabilities of the device.
Preliminarily define the following types of protocol structures and Commands, and focus on the SetHeartColor command.
// 命令 ID 枚举
enum class HidCommand : uint8_t {
  Ping = 0x01,
  Reboot = 0x0F,
  SetAllLEDs = 0x11,
  ShowLEDs = 0x12,
  ClearAllLEDs = 0x13,
  SetSingleLED = 0x14,
  SetHeartColor = 0x15,
  SetLEDRange = 0x16,
  PlayBeep = 0x21,
  BuzzerOn = 0x22,
  BuzzerOff = 0x23
};

// CMD 0x15 (Set Heart)
struct Payload_SetHeart {
  uint8_t heart_id;
  uint8_t r;
  uint8_t g;
  uint8_t b;
  uint8_t reserved[3];
};

// Payload 的 Union
union HidPayloadUnion {
  uint8_t raw[7]; // 原始 7 字节
  Payload_SetAll setAll;
  Payload_SetSingle setSingle;
  Payload_SetHeart setHeart;
  Payload_SetRange setRange;
  Payload_PlayBeep playBeep;
  Payload_BuzzerOn buzzerOn;
  Payload_NoArgs noArgs;
};

/**
 * @brief HID 命令包结构体
 * HID 堆栈已经消费了 Report ID,所以不包含 Report ID,
 */
struct HidCommandPacket {
    uint8_t cmd;             // Byte 0 (命令 ID)
    HidPayloadUnion payload; // Bytes 1-7 (负载)
};
Device Script is perfect
When Aurora delivers the color configuration, it will trigger the UpdateDevice(object keyColors, bool forced) function of Script Device. In this function, we can query all key color information.
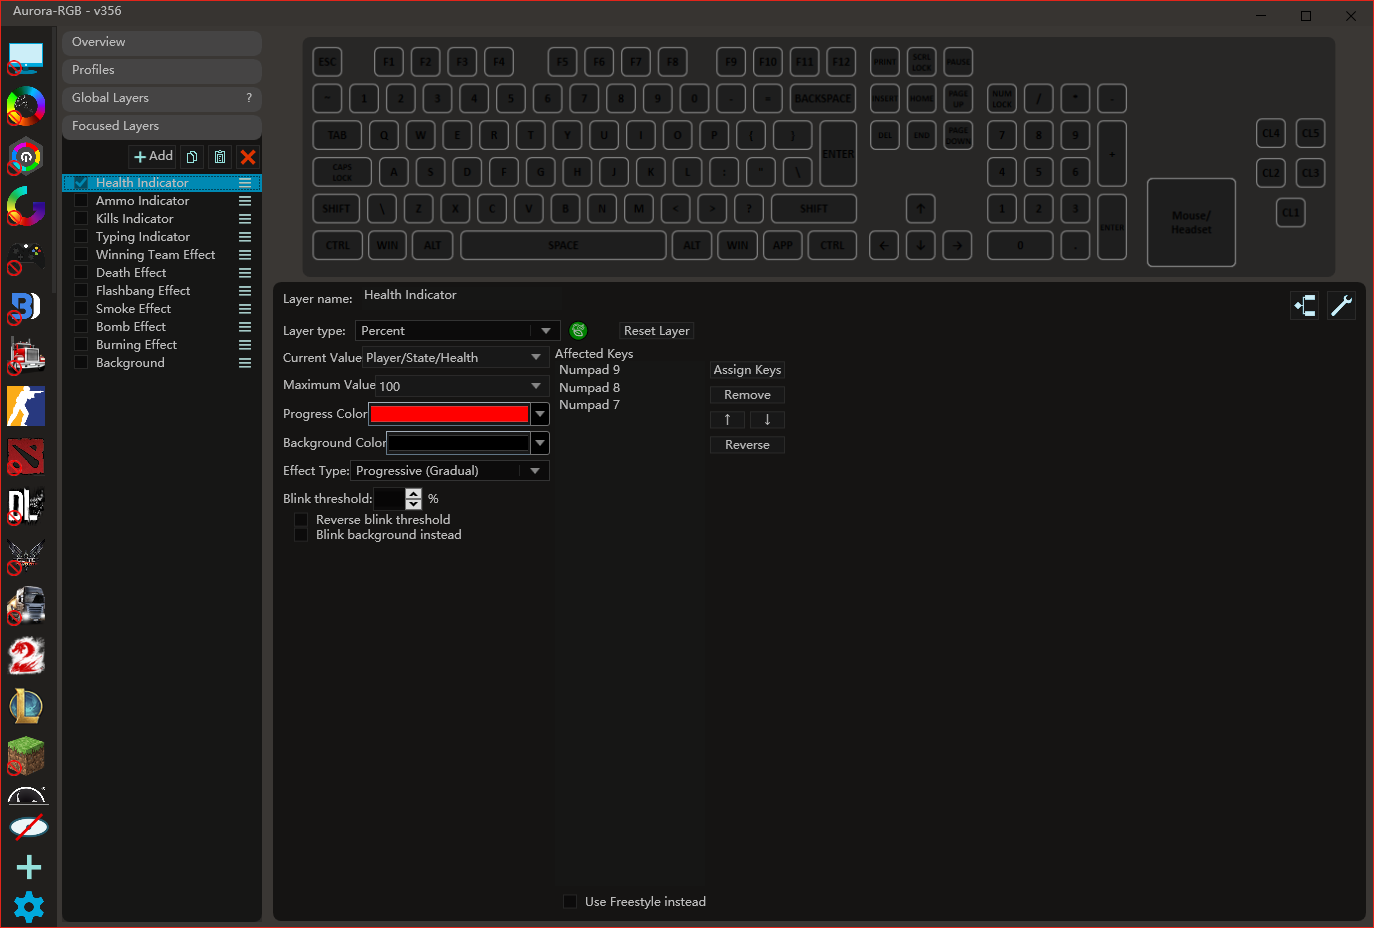
The three hearts of HealthPin are mapped to the three keys of the keyboard: 7, 8, and 9, so you only need to pay attention to the data of these three keys. Of course, if you want to pay attention to the configuration of F1, F2, and F3, there is no problem, but you need to pay attention to setting the corresponding keys when adjusting Profiles.
Color targetHeart1 = Color.Black;
Color targetHeart2 = Color.Black;
Color targetHeart3 = Color.Black;
var dict = keyColors as IDictionary;
foreach (DictionaryEntry entry in dict)
{
    string key = entry.Key?.ToString();
    if (string.IsNullOrEmpty(key)) continue;
    if (key.Equals("NUM_SEVEN", StringComparison.OrdinalIgnoreCase))
    {
        targetHeart1 = ParseColorObject(entry.Value);
        hasUpdate = true;
    }
    else if (key.Equals("NUM_EIGHT", StringComparison.OrdinalIgnoreCase))
    {
        targetHeart2 = ParseColorObject(entry.Value);
        hasUpdate = true;
    }
    else if (key.Equals("NUM_NINE", StringComparison.OrdinalIgnoreCase))
    {
        targetHeart3 = ParseColorObject(entry.Value);
        hasUpdate = true;
    }
}
To obtain color data, just use the HidD_SetFeature function to send the data.
private static extern bool HidD_SetFeature(
        SafeFileHandle HidDeviceObject,
        byte[] ReportBuffer,
        uint ReportBufferLength);
Lower computer program
The main reason why I chose CH592F was that many people use it as a keyboard, and the official example includes a Bluetooth-based HID_Keyboard example.
When conceiving this project, it was like pretending to be a HID device, and then communicating with the computer through HID. This solution does not need to consider the troublesome issues of serial port drivers or other USB drivers.
Driver WS2812B
For details, please refer to the WCH official implementation, which cleverly uses SPI to simulate WS2812 timing. I will not go into details here.
HID command analysis
This part can be processed in reverse to the host computer. In the hidEmuRptCB function, handle the situation of HID_DEV_OPER_WRITE, and then distinguish whether it is an event we need to pay attention to.
// 解析自定义的HID灯光协议
HidCommandPacket *packet = reinterpret_cast<HidCommandPacket *> (pData);
// USB_Printf("  -> Received Command ID: %d\n", packet->cmd);
switch (static_cast<HidCommand> (packet->cmd)) {

case HidCommand::ShowLEDs: {
    extern NeoPixelController *g_pLeds;
    if (g_pLeds) {
        g_pLeds->show();
    }
    break;
}
case HidCommand::SetHeartColor: {
    uint8_t heart_id = packet->payload.setHeart.heart_id;
    uint8_t r = packet->payload.setHeart.r;
    uint8_t g = packet->payload.setHeart.g;
    uint8_t b = packet->payload.setHeart.b;
    extern NeoPixelController *g_pLeds;
    if (g_pLeds) {
        switch (heart_id) {
        case 0:
            g_pLeds->heart1 (r << 16 | g << 8 | b);
            break;
        case 1:
            g_pLeds->heart2 (r << 16 | g << 8 | b);
            break;
        case 2:
            g_pLeds->heart3 (r << 16 | g << 8 | b);
            break;
        default:
            // 无效的 heart_id,忽略
            break;
        }
    }
    break;
}

case HidCommand::PlayBeep:
case HidCommand::BuzzerOff:
case HidCommand::SetSingleLED:
case HidCommand::SetAllLEDs: {
    // 省略其余具体实现
    break;
}
default:
    // 收到未知命令
    break;
}
Then enjoy Aurora’s support for a large number of games, as well as its rich lighting configurations.
video
Legal and Copyright Notice
- Software Agreement: The code part involved in this project is for learning and research only.
- Trademark Notice: Valve, Counter-Strike, Steam, Half-Life and their corresponding logos are trademarks and/or registered trademarks of Valve Corporation.
- Dishonest Behavior Compliance: This project does not involve modification, cracking or cheating of the game. It only reads read-only data through the officially allowed GSI (Game State Integration) interface to display the breathing light effect.